This guide is for anyone interested in learning to use Maya. I will teach you how to make a simple cactus, and you will get a chance to become more comfortable with Maya and its various features. No prior experience necessary: you just need Maya on your computer. If you are using Maya LT, some UI may look different, but it’s a lot of the same concepts.
Let’s begin!
Setting Up
It’s helpful to find a reference image to base your design on, so save this image. We’ll be making a cactus that more or less looks like this (but won’t be as detailed).


When you open up Maya, you’ll see an empty grid with a bunch of menus around it. It’s okay if the UI looks a little different for you: the important thing is the empty grid.

Hit space to pull up this quadrant view. If it’s not working for you, click on
the grid (or anywhere in that window) then try again. This will show four
windows with different views: 3D, front, top, and side.
The bottom-left corner is the front view. That’s where we want to put our
reference image. See the View option in that corner’s header? Click that, then
Image Plane > Import Image.... Import the cactus picture.
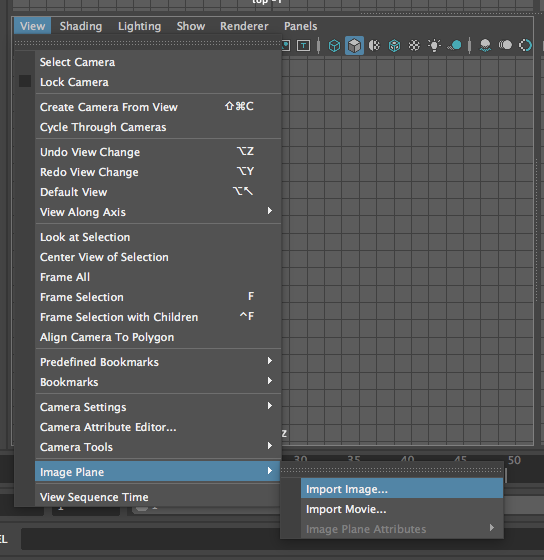
Now you’ll have something that looks like this:
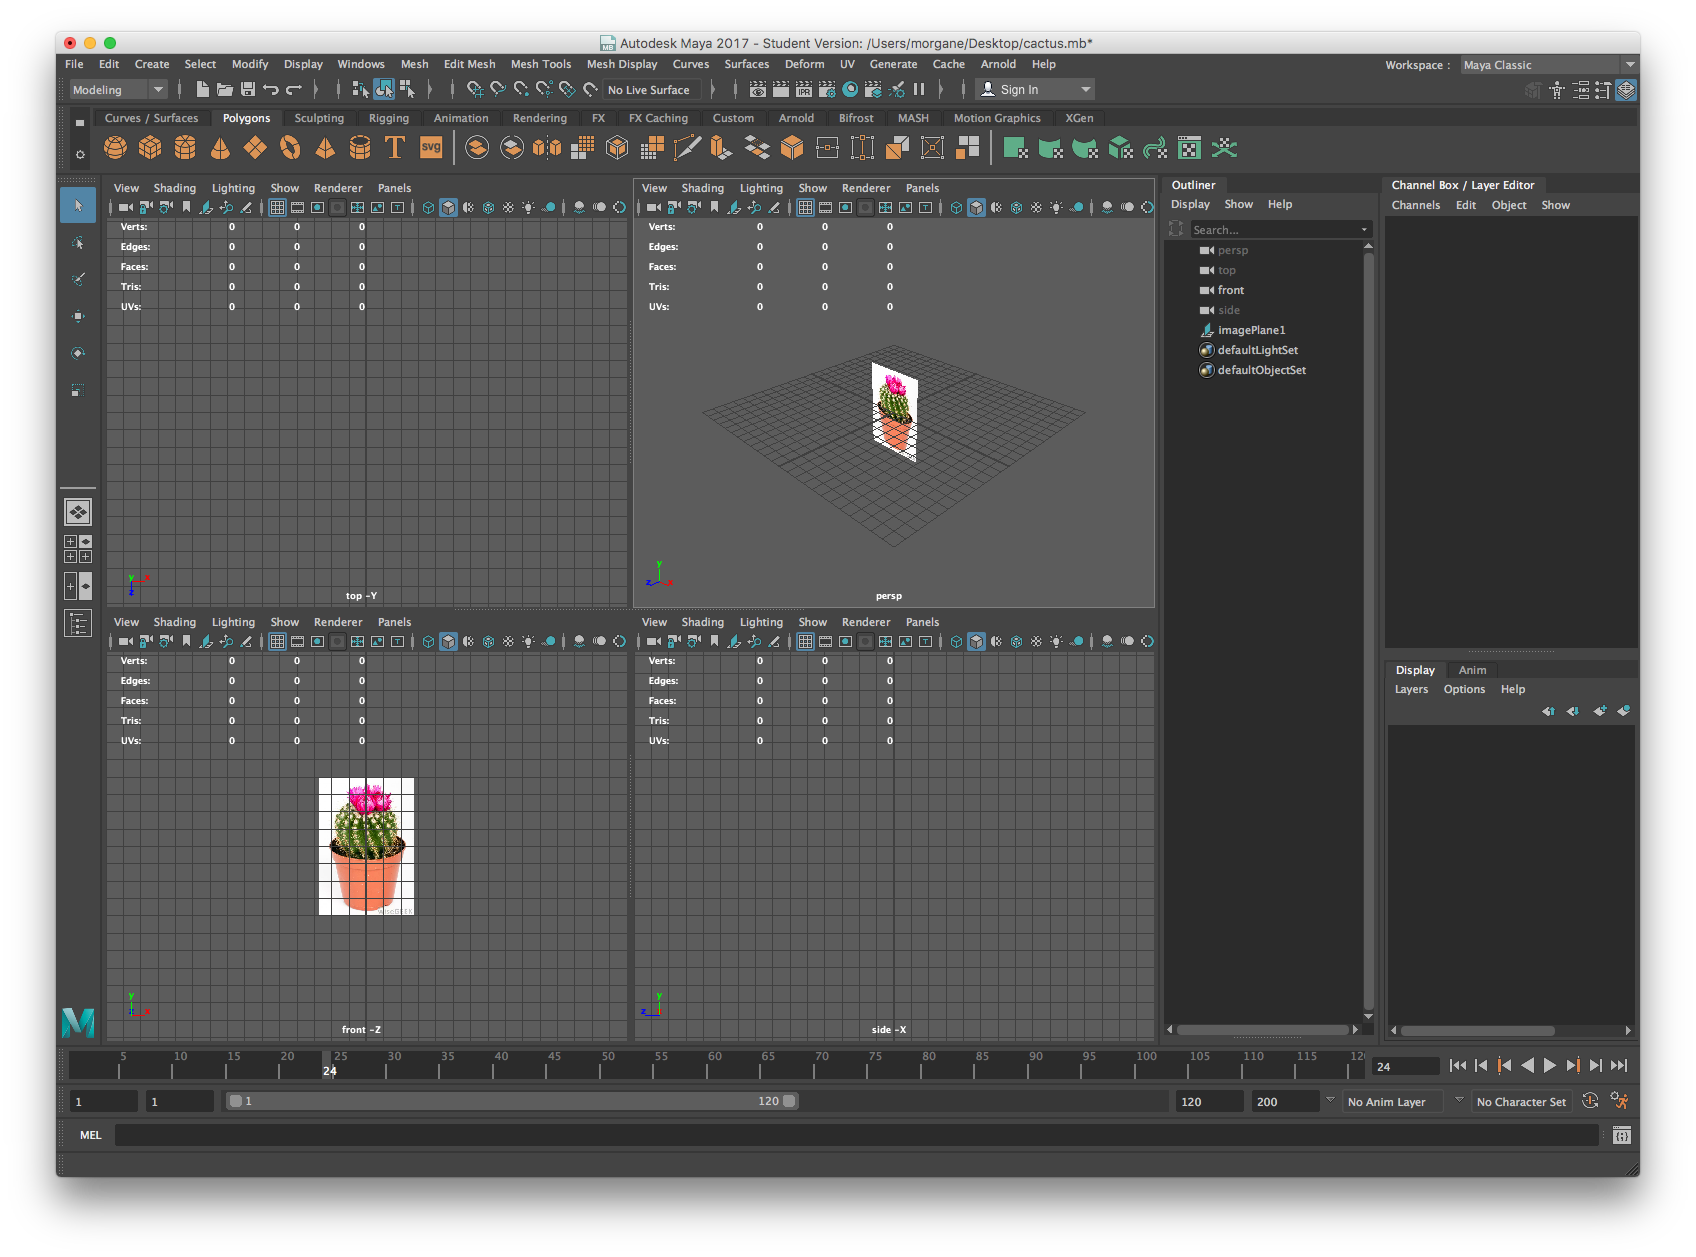
It’s centered on the grid, which means half the image is below the grid. You can
leave it like that, but I find it distracting. To move it up, click on the image
in the top-right corner (you can do this from the bottom-left corner too, but
it’s not as clear where the axis is). With the image selected, hit W to use
the move tool. Select the arrow facing up and drag the image up until it looks
like all of it is on top of the grid. No need to be precise here.
To zoom in, you can do a two-finger scroll if you’re using a trackpad, or use
the scroll wheel on a mouse. To pan around, hit alt + cmd + click (works for
either trackpad or mouse). To rotate, alt + click. This is what I see now:

Alright, we’re ready to make something!
Making the Flower Pot
A flower pot is really just cylinder, with the top part a little wider than the bottom. Luckily, cylinders are a default shape in Maya!

From the quadrant view, hover over the top-right window (that one that looks 3D)
then hit space. This will now show only that particular window. To create a
cylinder, look for the Polygons menu at the top and click the cylinder icon,
then click anywhere on the grid. This will create a standard cylinder. We want
to make sure it’s centered, so make sure it’s at 0, 0, 0. Fix the Translate
fields as needed in the Channel Box menu:
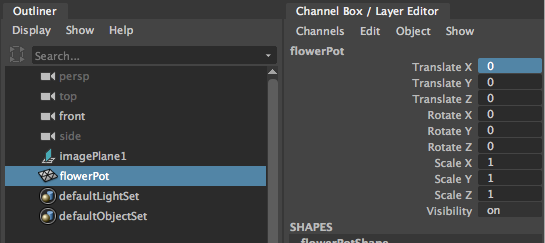
This is also a good time to rename your cylinder object: double-click it in the
Outliner menu, then rename it to something more meaningful, like “flowerPot”.
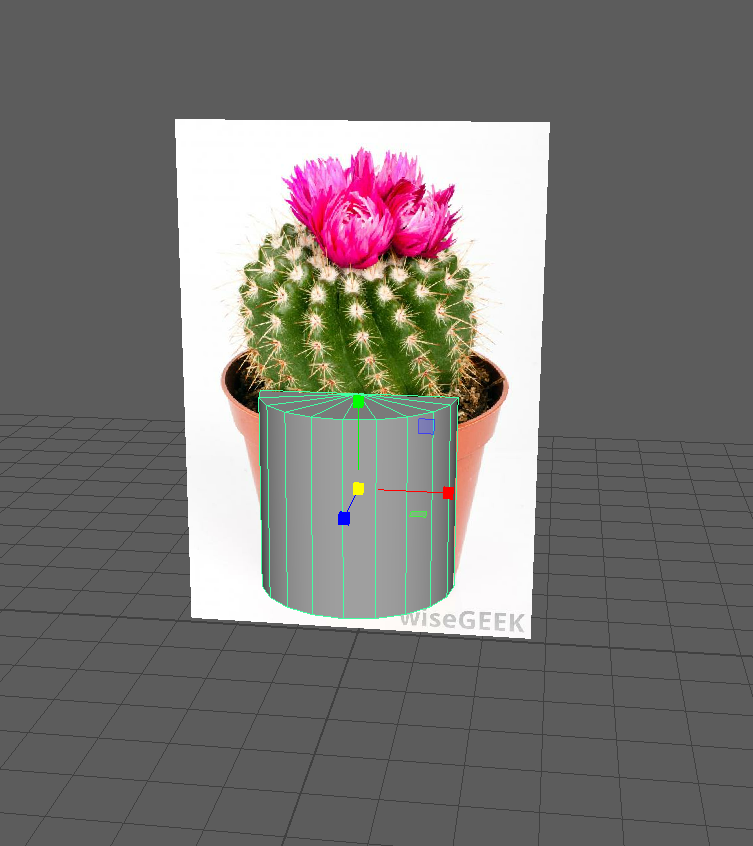
Let’s move the cylinder up a little. If the arrows aren’t already on the object,
click it then hit W and drag it up to be about level to the flower pot image.
Hit R to scale it up, and try to make it about the same height at the flower
pot image, and in about the same position. To scale an object uniformly, use
that center yellow cube instead of the ones along an axis.
I want the flower pot to be fairly low-poly (fewer faces, looks less realistic),
so let’s adjust that. Select the flower pot object, then look over at the
Channel Box. Click polyCylinder1 under INPUTS and you’ll see some
information about the object. Change the value of Subdivisions Axis to 8 (or
7, or 10… whatever looks cool to you).
Now we’re going to adjust the width of the top of the flower pot. Right click on
the object and you’ll see a small menu show up. Keep pressing down, and drag to
the Edge option. The edges should now be outlined in blue. Double-click on any
one of the top edges, and this will select all of them: they’ll now be
highlighted in orange. Scale them (R) by dragging the yellow center cube out a
little bit. You will end up with something like this:
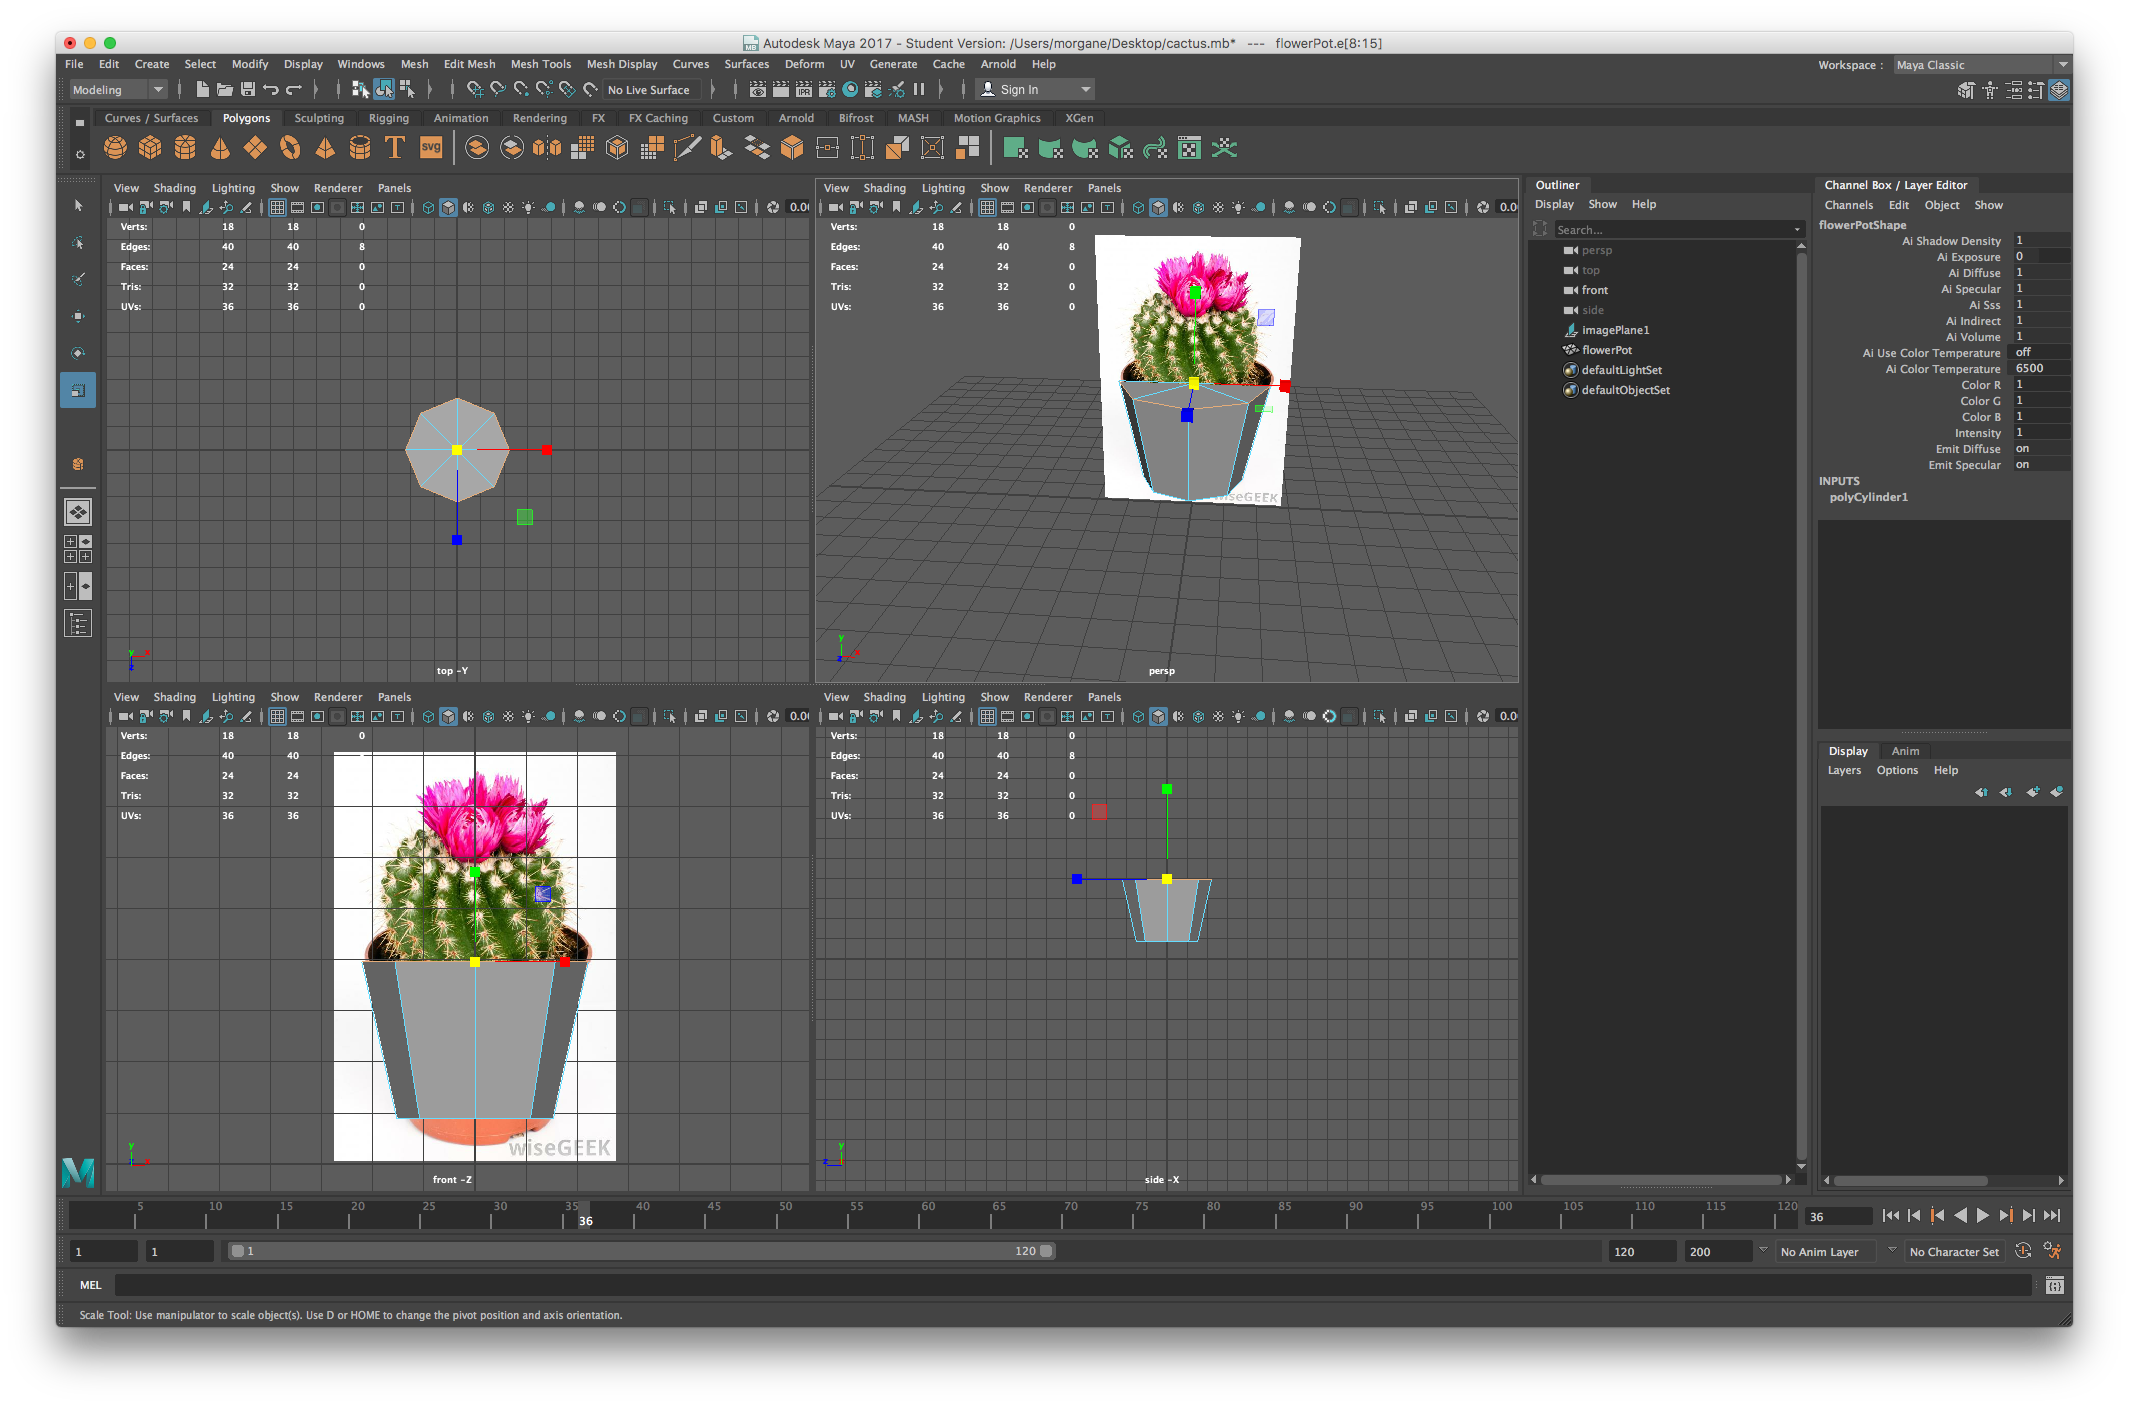
You can adjust the bottom width too, by using the same technique along the bottom edges.
This looks a little basic, so let’s add one final detail. Right-click on the
object and drag to select Face. Select all the top faces (there should be
about 8 of them) by clicking on one then shift-clicking on the others until you
have all of them selected. Look at the top menu and find Edit Mesh. Select
Edit Mesh > Extrude. Extrude can work in mysterious ways so it might take some
getting used to. But here, we can just extrude the faces straight up a little
bit, to create the lip of the flower pot. Once you’re satisfied with how it
looks, hit Q (select tool) to safely exit extrude mode. You’ll end up with
something like this:

That’s it for our flower pot! We’ll add colors later. Now, let’s make the cactus.
Cactus
The cactus might look a little more complicated, but it’s also based on a simple shape: the sphere. And luckily again, that’s one of the basic shapes in Maya.
To create a sphere, click on the sphere icon in the Polygons section. Don’t
worry about centering it just yet. In fact, it might be easier to create this
off in the corner somewhere. We can align it to the flower pot later.
Once you have a sphere to work with, change the Subdivisions Height and
Subdivisions Axis values to 8 (or whatever looks cool). Then, using the
scaling mode (R), stretch out the sphere and make it more of a rounded,
football shape. This can be a very organic process and doesn’t need to be very
precise. Here’s mine right now:

We could stop here, for a really lo-fi look, but the cactus in the reference image has a bit of a twist to it, and it’ll be cool to recreate that here. So let’s use the soft selection tool to add a gradual twist to the top half of the cactus!.
Right-click the cactus and select Edge. Double-click one of the edges in the
top ring to select the whole ring. Hit B, and while holding down the B key,
drag with your mouse. A circle will appear: expand it so it encircles all the
edges in the top half of the cactus.
With those selected, hit E and use the rotation tool to twist them to one
side. This will twist them in a “gradient” manner, with the top ring rotating
the most and the rings further away rotating less and less.

Before we align this with the flower pot, lets clean it up a bit. We only twisted the top half of this oval because we’ll never even see the bottom half. If you’re making this cactus for a game or a VR app, you want to minimize how many polygons (faces) you use to render an object. This is because it gets computationally expensive to render more and more polygons, and if you’re concerned about performance, it’s best to simply get rid of polygons you won’t need anyway.
Right-click the object and select Face. Shift-click all the faces on the lower
half of the cactus… and then hit delete. That’s it! They’re all gone.

If your flower pot is centered, you can place the cactus at position 0,0,0
(change the Translate values), then use the move tool (W) to drag it up,
until it looks like it’s coming out of the flower pot. Use the scale tool (R)
to adjust the size as needed.

Flower Power
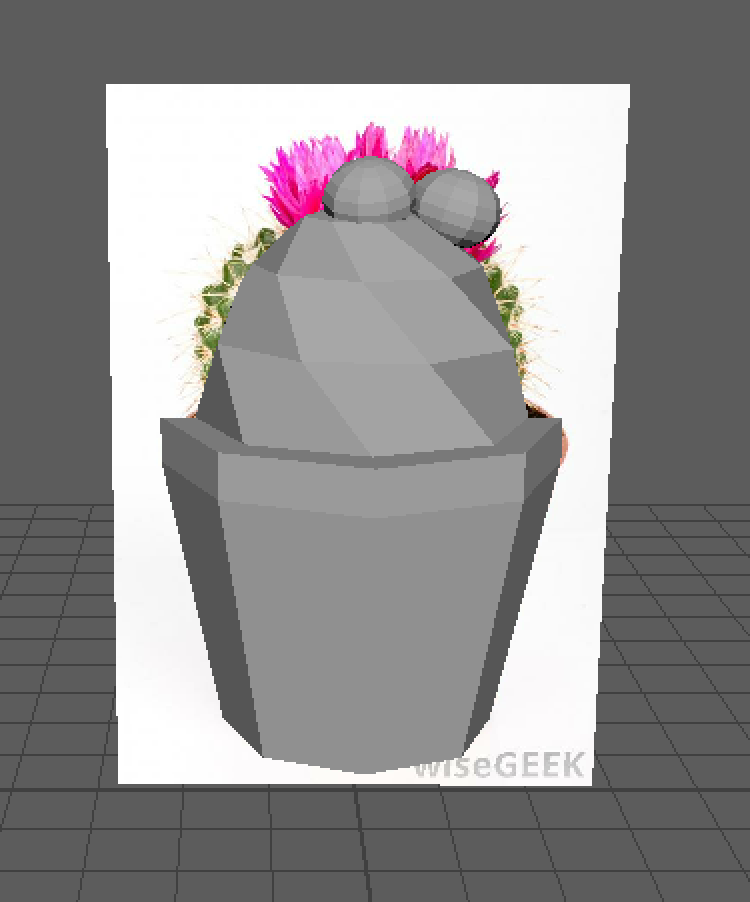
Now let’s add the flowers! To keep this simple, these will also just be spheres.
Make 2 or 3 small spheres and position them on top of the cactus. Adjust their
Subdivisions Axis and Subdivisions Height to achieve the same low-poly look
as the rest of the model. Scale (R) them to be the right size, rotate (E)
them, and move (W) them into position. Use cmd + D to duplicate them, so you
don’t have to start over from scratch each time.
A Splash of Color
The last thing we need to add is color. Move the image plane out of the way so
we can just look at it for color inspiration. Select your flower pot object,
right-click, and drag all the way down to select Assign New Material. A lot of
stuff will show up, but don’t worry about any of it. Look for something called
Phong. Select that. An editor like this will appear:

Rename this material to something more descriptive, like “flowerPotMaterial”. Descriptive names may not seem like a big deal for such a small model, but as your work gets more complicated, it’s good to stay organized.
Click on the color swatch to change its color to something more orangey-red, or really, any color you like! You’ll notice that the flower pot will change according to your tweaks, so you can tell what it looks like in realtime. Feel free to play around with all the other attributes too, if you want a really surreal flower pot.
Now do the same thing for the green part of the cactus. Assign a new material, change it to be the right color, and admire your handiwork.

Assign a new material to one of the flowers, and remember to give it a
descriptive name! For all the remaining flowers, you can right-click on them
then drag to select Assign Existing Material, then choose the flower material.

Lookin’ sharp! You made a cute, lo-fi little cactus.
Now what?
Exporting to Unity
For many of you, you might be looking to add models into Unity. Luckily Maya makes this very easy.
Select all the different objects (flower pot, cactus, flowers) then hit cmd +
G to group them. Give this group a good name, like “cactus”. This will allow
you to move, manipulate, and export the entire object at once.
Then go to File > Send to Unity > Selection, with the cactus object selected.
This will walk you through a flow to export to a certain Unity file. Now you can
use this model in your Unity scenes!

Recap
Awesome work! Let’s review a few of the things you learned:
- How to create, move, rotate, and scale objects
- How to edit entire objects or just their edges or faces
- How to create new materials and assign them to give your objects some color
- How to export to Unity
Finally, here are a few extra resources if you want to continue learning more about Maya:
