Shalom 👋🏼 and welcome to another installment of, “Things I Cannot Remember But Can, If Given Enough Time, Create a Cool Visual For Which I Can Then Blog About And Pretend It Is For the Greater Community But Is Really Just For Me and My Forgetful Brain.”
On today’s episode we are going to focus on a particular method in Android’s
Canvas class. Specifically the drawArc method. There are two Canvas.drawArc
method implementations:
public void drawArc(RectF oval, float startAngle, float sweepAngle, boolean useCenter, Paint paint)

public void drawArc(float left, float top, float right, float bottom, float startAngle, float sweepAngle, boolean useCenter, Paint paint)
The only difference between the two is that the first one takes a RectF
whereas the second one takes all the values (top, left, right, and
bottom) necessary to create a RectF. So for the sake of “let’s not confuse
the reader” I’m just going to focus on the simpler method which takes a RectF.
Now let’s go through all the parameters:
RectF oval- According to the docs, this parameter represents “the bounds of oval used to define the shape and size of the arc”. This is important because it helps to remind us that when we are drawing an arc, we are really drawing a section of an oval.float startAngle- Now we are getting into the land of confusion. The docs define this parameter as the “starting angle (in degrees) where the arc begins”. If you’re asking yourself, “starting from what!?” then you are a mind reader and have accurately guessed exactly what I thought when reading that. But before I help answer your woes, let’s continue with the other parameters.float sweepAngle- Another parameter with the word “angle” in it! Not a great start. The docs define this parameter as the “sweep angle (in degrees) measured clockwise”. At this point if you’re like me you’re probably wondering “what on earth is a sweep angle”. But don’t worry, all shall soon be revealed.boolean useCenter- Now this one, surprisingly, has a super helpful description! According to the docs, “if true, include the center of the oval in the arc, and close it if it is being stroked. This will draw a wedge.” Finally! A visual clue for a visual method!Paint paint- And lastly, thePaintobject used to draw our arc.
Okay now that we’ve covered all of the parameters, let’s go back to the two
middle ones with annoyingly similar names - startAngle and sweepAngle. The
easiest way for me to explain (and for me to understand) these concepts is with
a visual aid! So let’s get lookin’ 👀

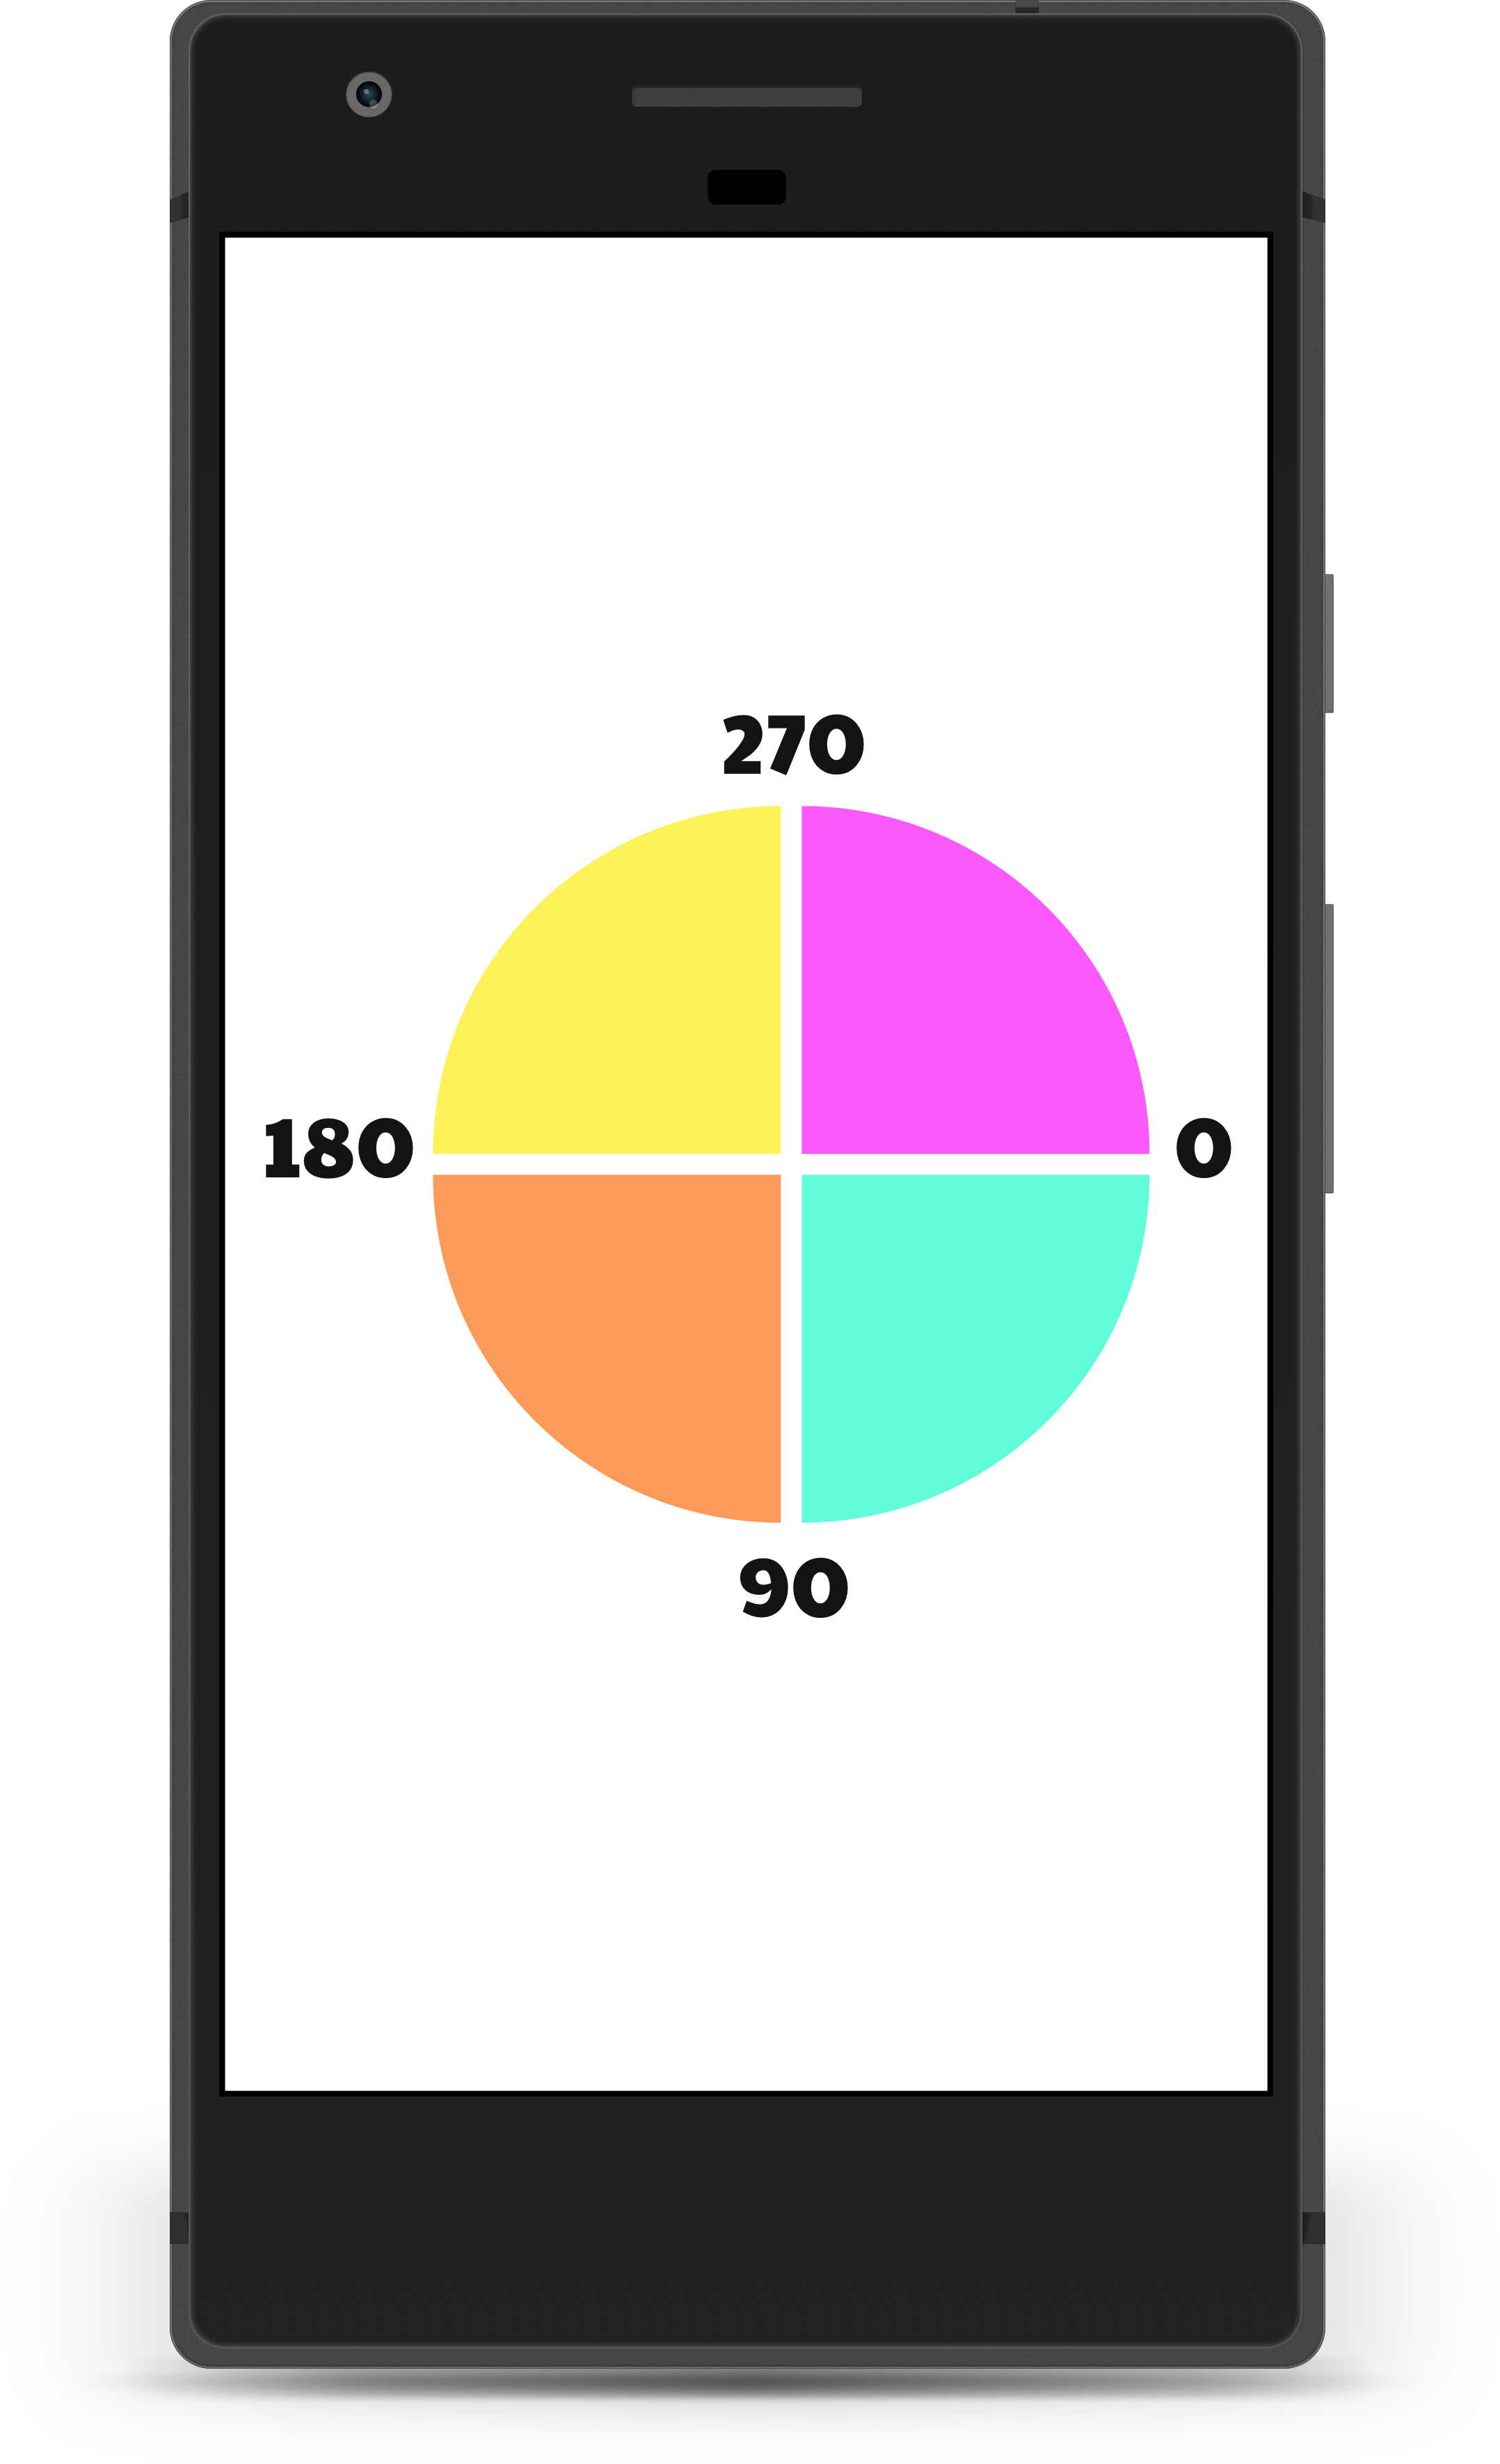
Notice how 0 is on the right hand side. Remember the definition of
startAngle and how we had no idea from where or whence the arc begins? Well
here’s your answer. It begins on the right hand side.
Now for the sweepAngle… The sweepAngle is the degrees from the
startAngle that you want to draw (in a clockwise 🔁 ⏰ motion). Let’s go
through some examples together. Let’s try and draw the turquoise slice. Our
startAngle would be 0 and our sweepAngle would be 90. And for the same
startAngle (0) if we passed in a sweepAngle of 180 we would get the
turquoise and the orange slice. In case English isn’t your thang, here’s the
code for the above image:
canvas.drawArc(oval, 0F, 90F, true, turquoisePaint)

canvas.drawArc(oval, 90F, 90F, true, orangePaint)

canvas.drawArc(oval, 180F, 90F, true, yellowPaint)

canvas.drawArc(oval, 270F, 90F, true, hotPinkPaint)
note 📝 : In case you’re wondering about the white lines between each of the slices in the above image, please note I made these images in Sketch so they would be prettier and scale for this post and that the code I provided above would not have yielded these dividers.
hot tip 🔥 : If you want to sweep in the other direction, i.e. from the
0 to 270 you can just pass a negative value for sweepAngle making the
angle move counter clockwise 🔄 ⏰
And in case you’re wondering what happens if we make useCenter false here ya
go:

Aaaand that’s all she wrote! ‘Till next time I forget something and have the time to draw a visual aid for it 👋🏼
shameless 🔌 : if you want more “forget me no more because Amanda made a visual aid” posts, checkout ImageView ScaleType: A Visual Guide and Android Interpolators: A Visual Guide
