Who doesn’t love La Croix? No one. We at thoughtbot are no different than everyone else. Our insatiable thirst for La Croix has caused our recycling bins to runneth over with a rainbow of colored aluminum cans. So we did as anyone would do and purchased a can crusher to minimize the space needed to corral all that aluminum. However, something was still amiss. We still didn’t know who was Top Croix and it was eating away at us.
At the end of every year, thoughtbot sets aside two days to group together fellow thoughtbotters and build or create something. We call it Ralphapalooza since our logo is a robot named Ralph and it’s a palooza. So this year three of us got together and decided to build Canimal, a can crushing tracker. Canimal would be some sort of device that lived near the can crusher to track every time a different person crushed a can. Our team had been tinkering with embedded hardware on other projects and so we decided to make this an IoT project.
Materials
The biggest choice for us was which development board to use. There are so many out there now between Linux based ones like the Raspberry Pi and the C.H.I.P. as well as simpler embedded ones like the Arduino boards. We’re all already familiar with Linux so we decided to explore the lesser known and pick an Arduino style board. We chose the Particle Photon board for its easy WiFi network configuration. This board is truly amazing. Setting up the WiFi connection is painless and then you’re left with the amazing Arduino interface with extra functions to publish data to the Particle Cloud.
Next, we had to decide how we would match each crush to a particular person. For the sake of simplicity for the user, we decided to use a single button for each person. At the time, the thoughtbot San Francisco office had 16 employees which meant 16 buttons. 16 buttons is a lot of buttons and we didn’t have enough inputs on our Photon board to wire up each one individually. There are some really neat hardware concepts to reduce the number of pins needed and this was a great opportunity to learn more about them.
A shift register is a chip that converts a serial signal to a parallel one or vice versa. This could help us translate 16 buttons to one or two inputs on the Photon. However, if we wanted more than 16 buttons when we hire new employees, this would be a big change and shift registers bigger than this are hard to find or don’t come in sizes that we can use.
Another option was an encoder which encodes a bunch of parallel input to a binary value. In other words, to express 16 buttons of input we would need 4 bits since 24 is 16. However, decoders suffer from the same faults as shift registers in that if we wanted to add one more button it wouldn’t be too easy.
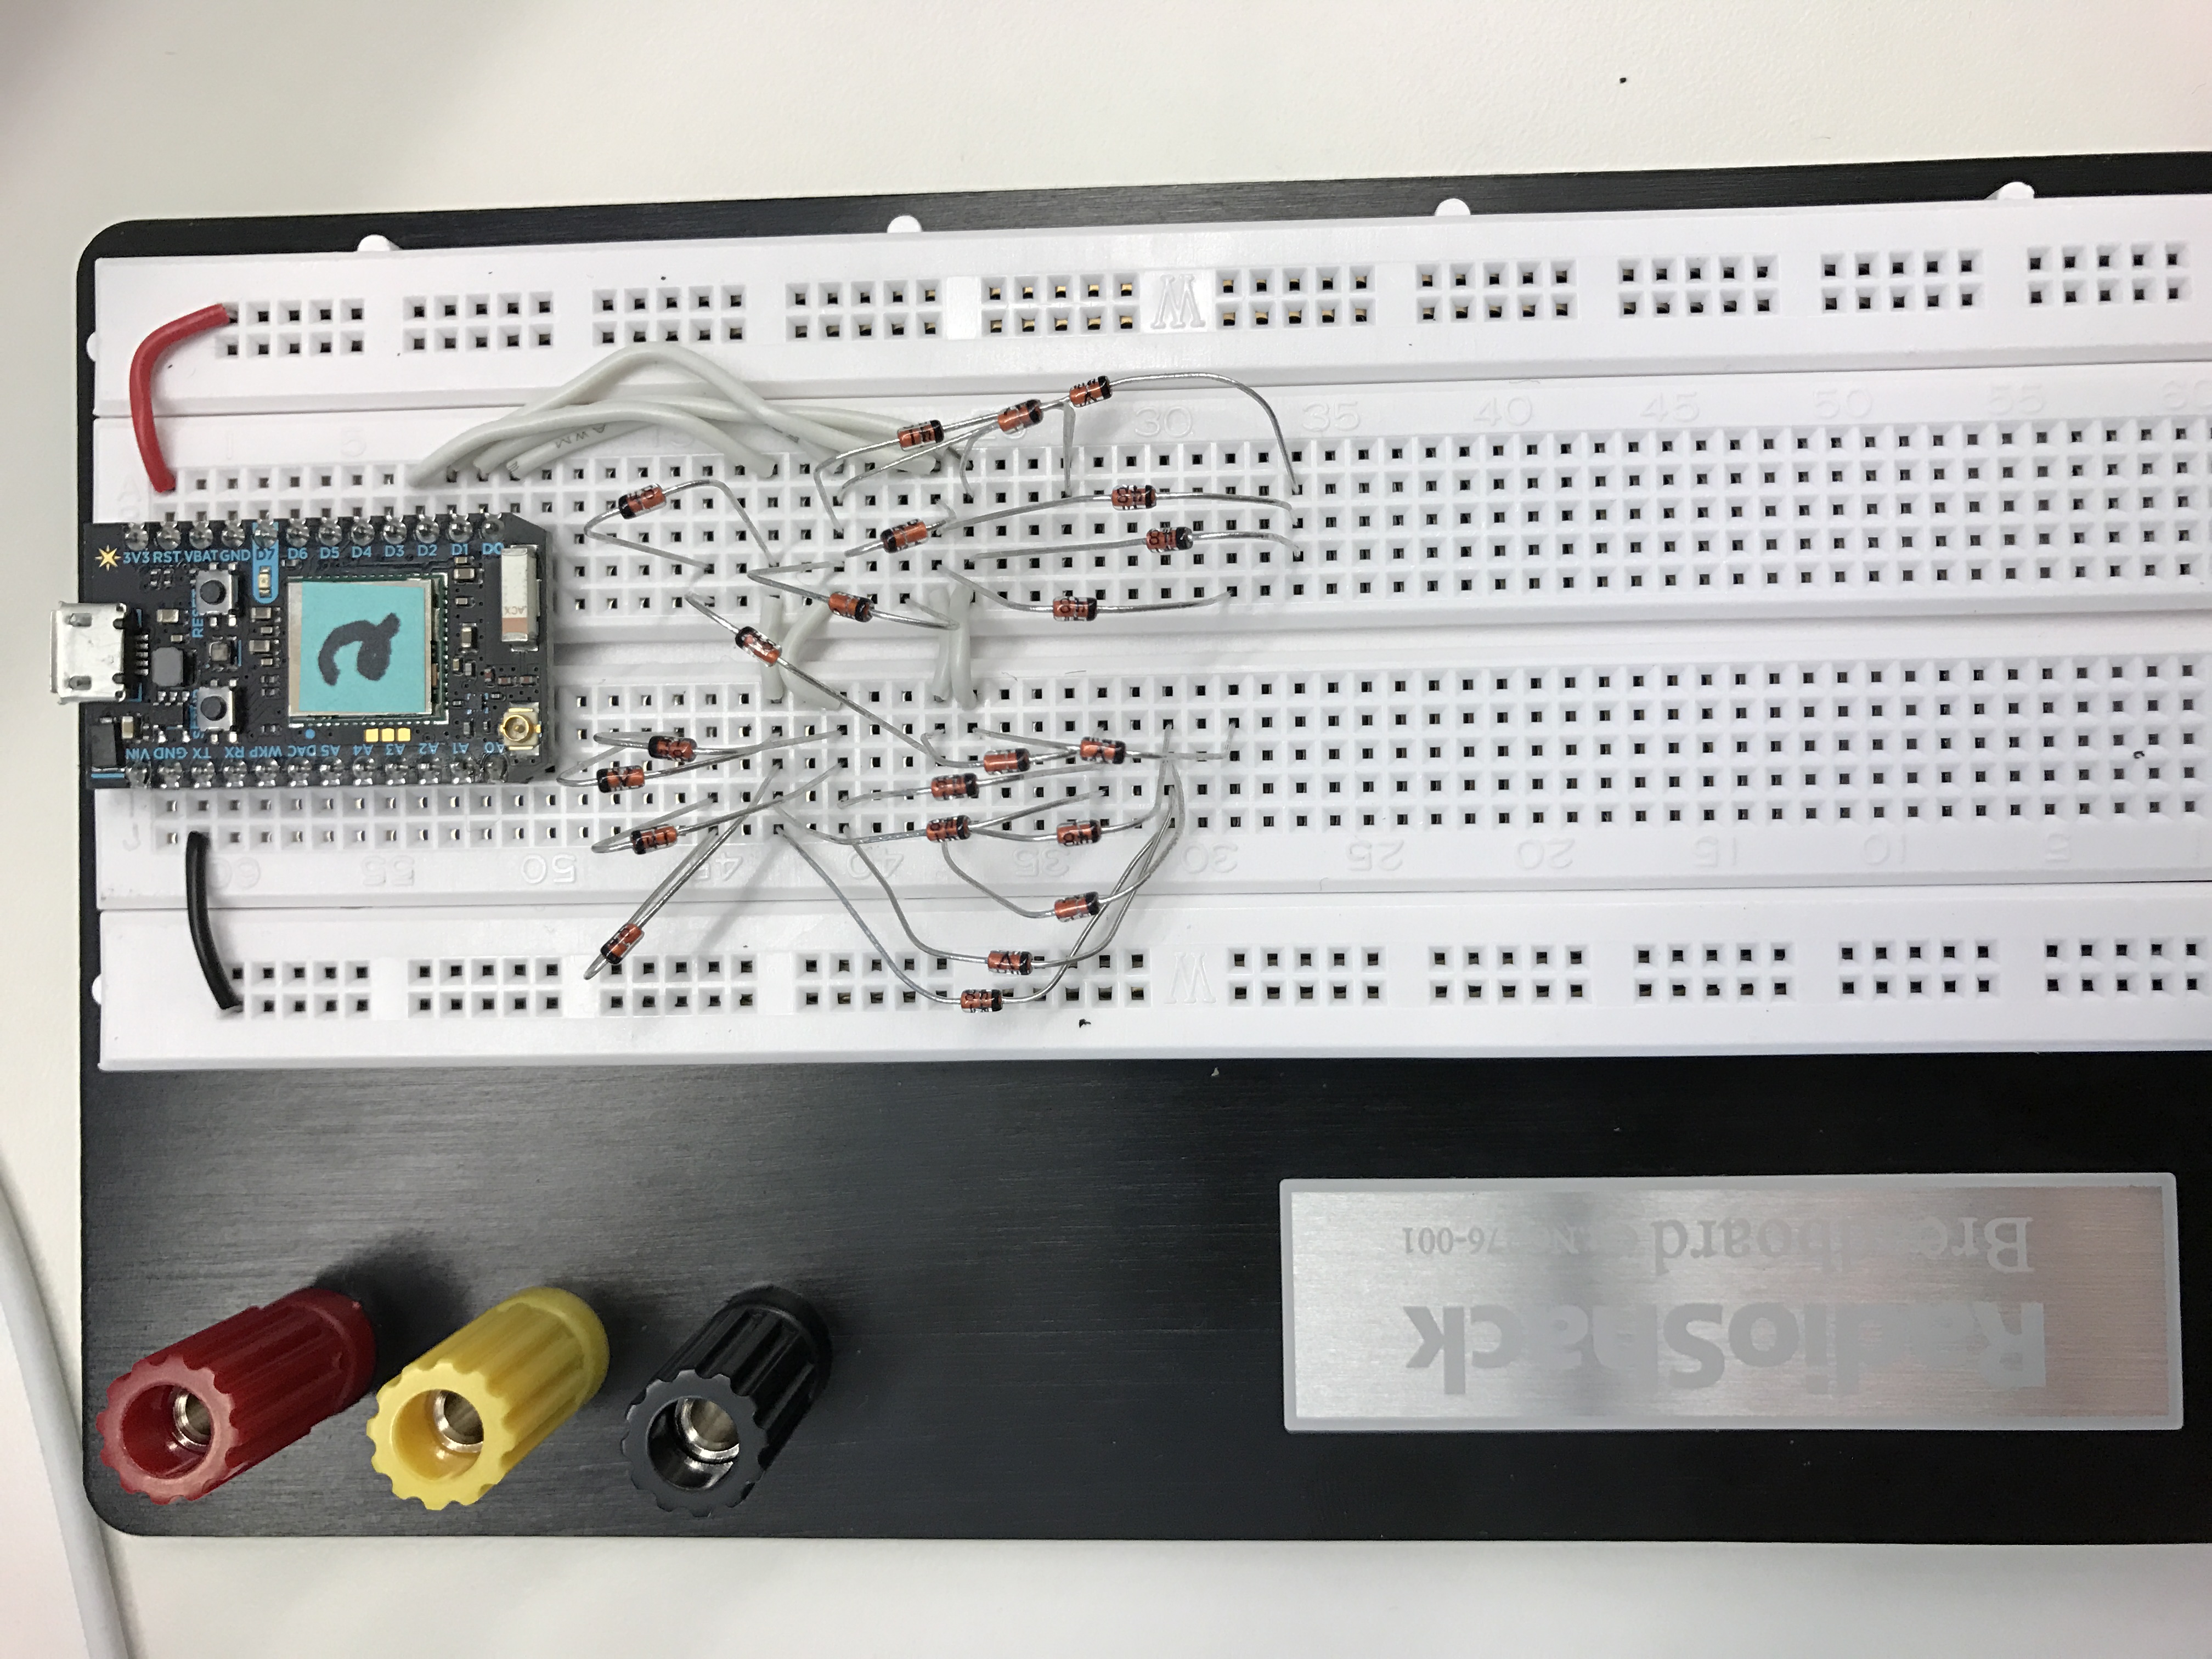
Ralphapalooza is only two days long, and the local RadioShack didn’t carry shift registers or encoders. For the short term, we dececided to build our own encoder with a lot of diodes. As you can see, this was a bit of a mess.
The real and final solution was to use the SX1509 I/O Expander from Sparkfun. It is similar in concept to a shift register where it converts a bunch of parallel input into a serial signal. We chose it because it has a built in keypad engine that allows up to 64 inputs. 64 inputs is plenty for our foreseeable future and it comes with a built in sleep mode and interrupt line which will be great for low power use. We also picked up a serial LCD screen from Sparkfun to display feedback to the user.
Finally, we popped into our local RadioShack to grab a handful of buttons, a bread board, and a project container.
Assembly
To assemble the case, we first used a drill press to make holes for each button and the LCD screen. Then we wired up all the buttons by soldering one side of the buttons in a column configuration and the other side in a row configuration.
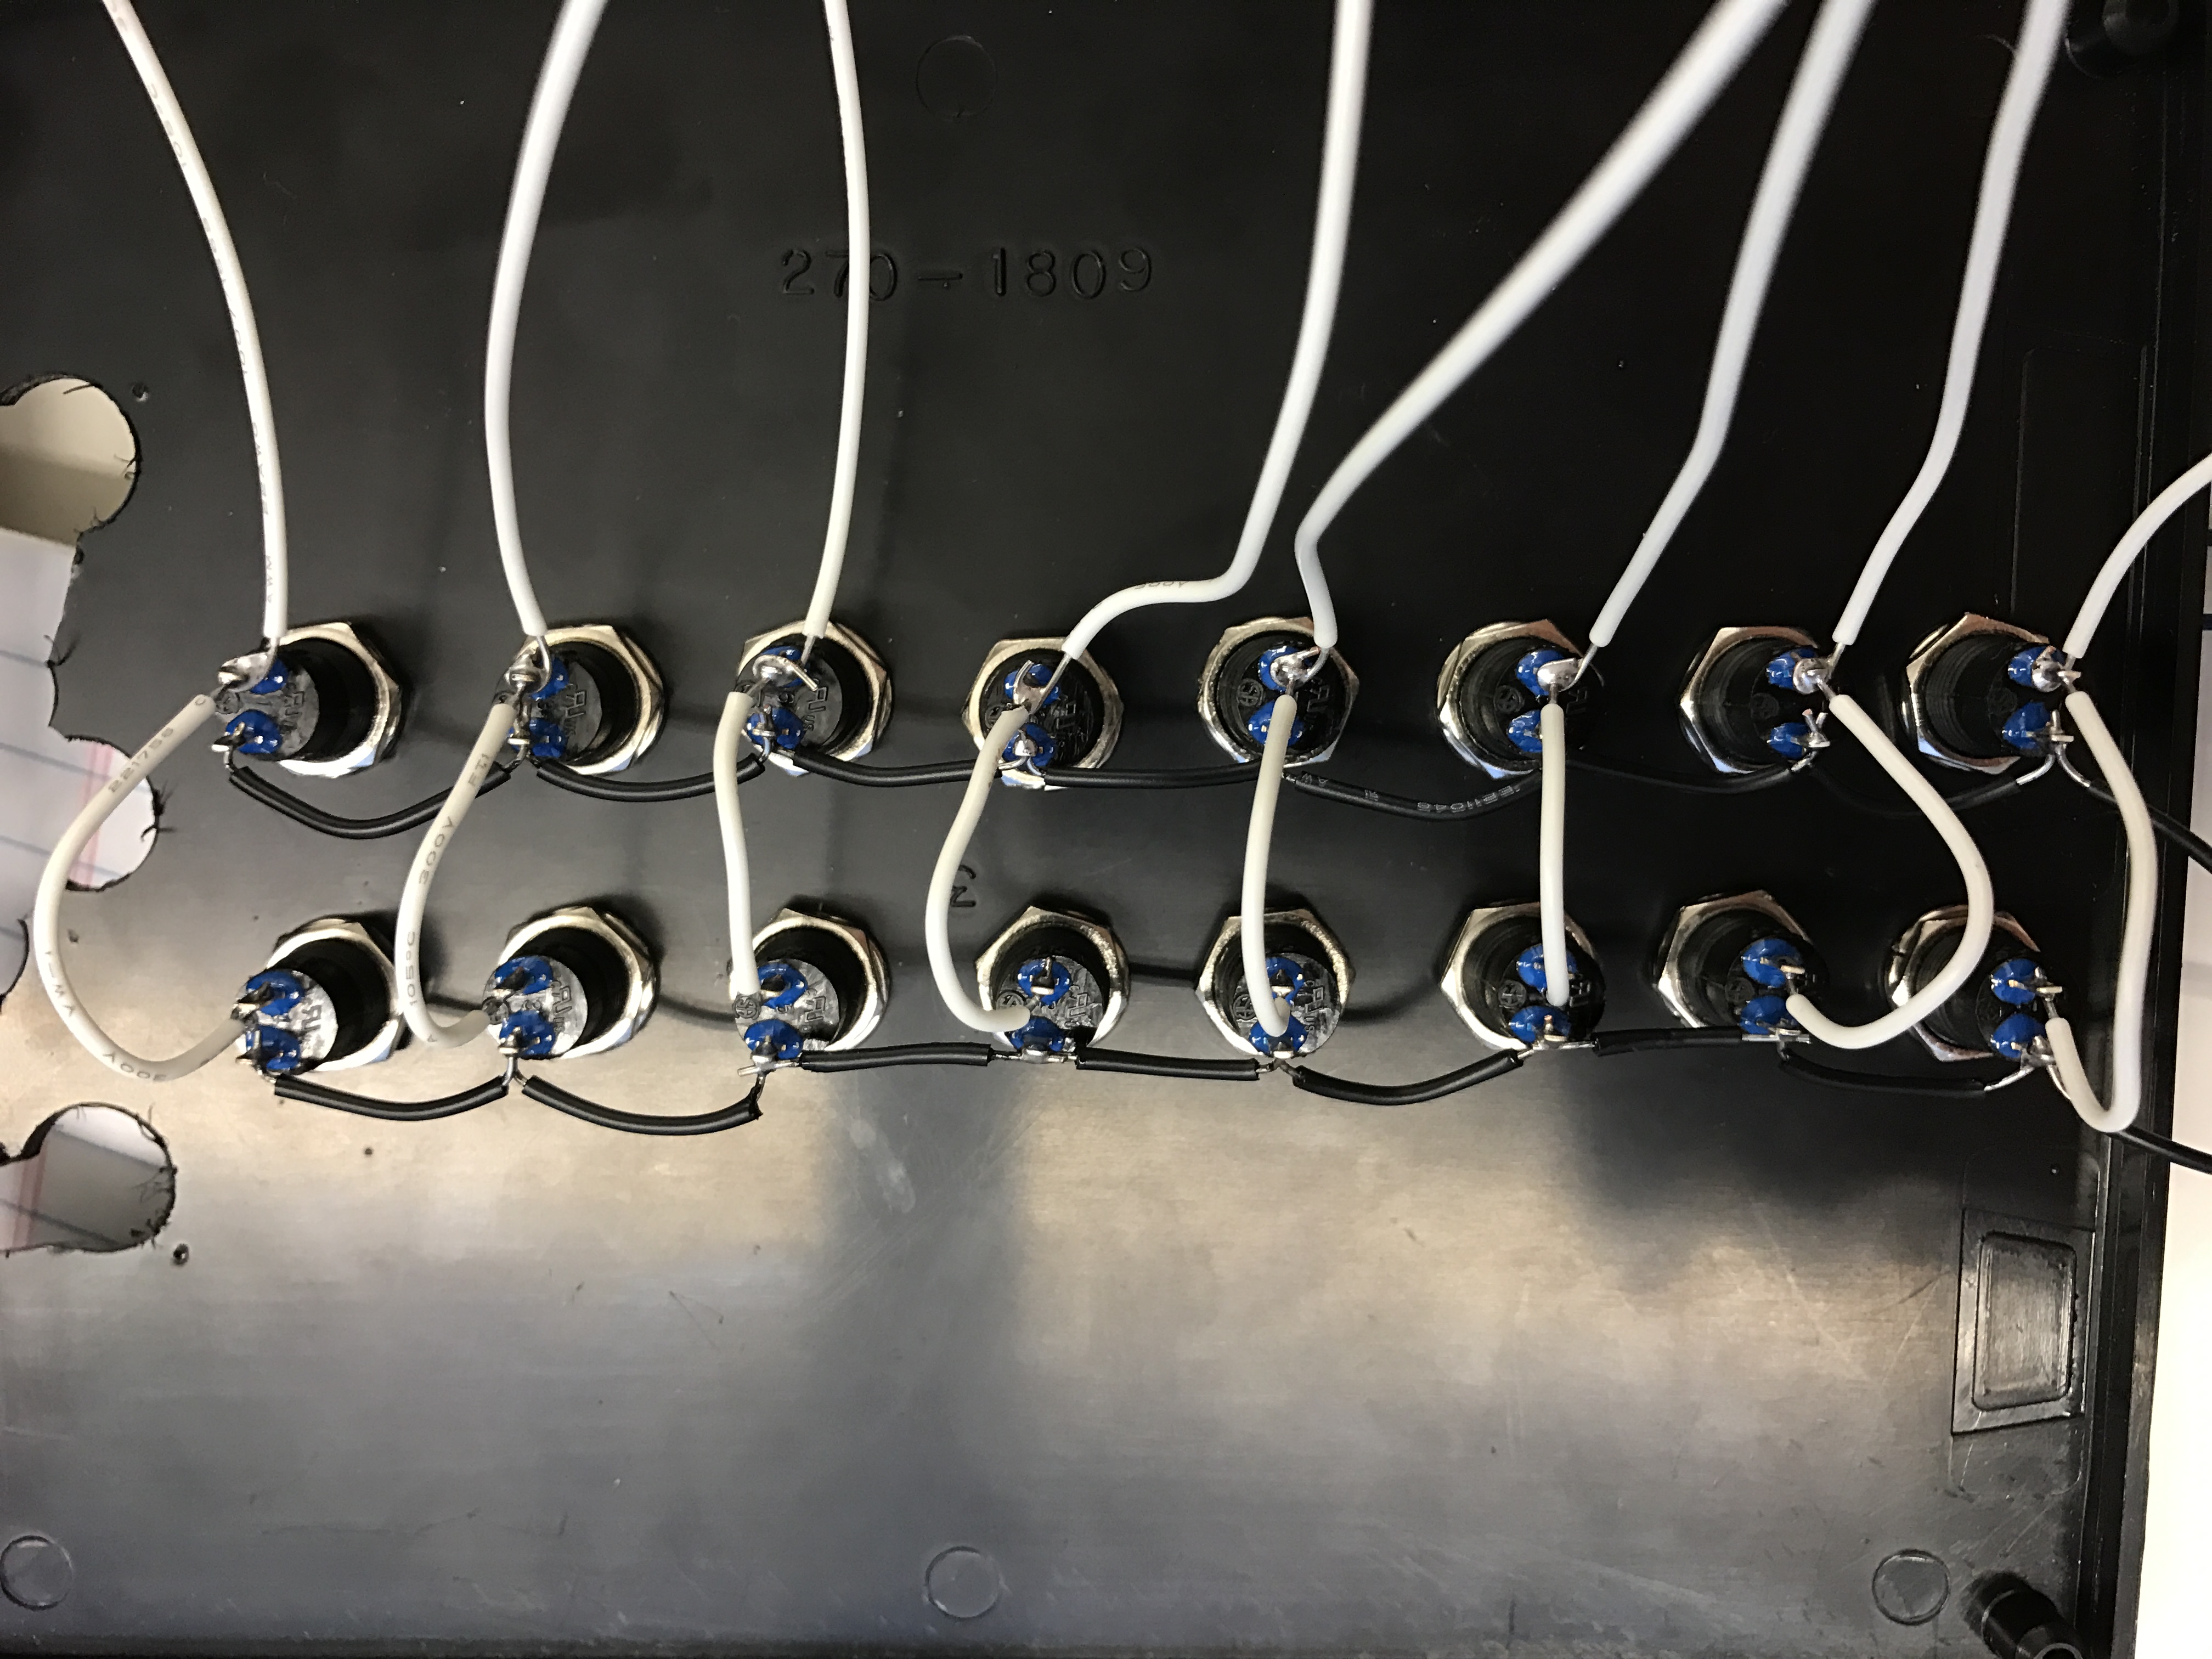
Then we plugged the rows and columns into the I/O Expander’s respective sides and connected the SDA, SCK, and INT pins to the Photon.

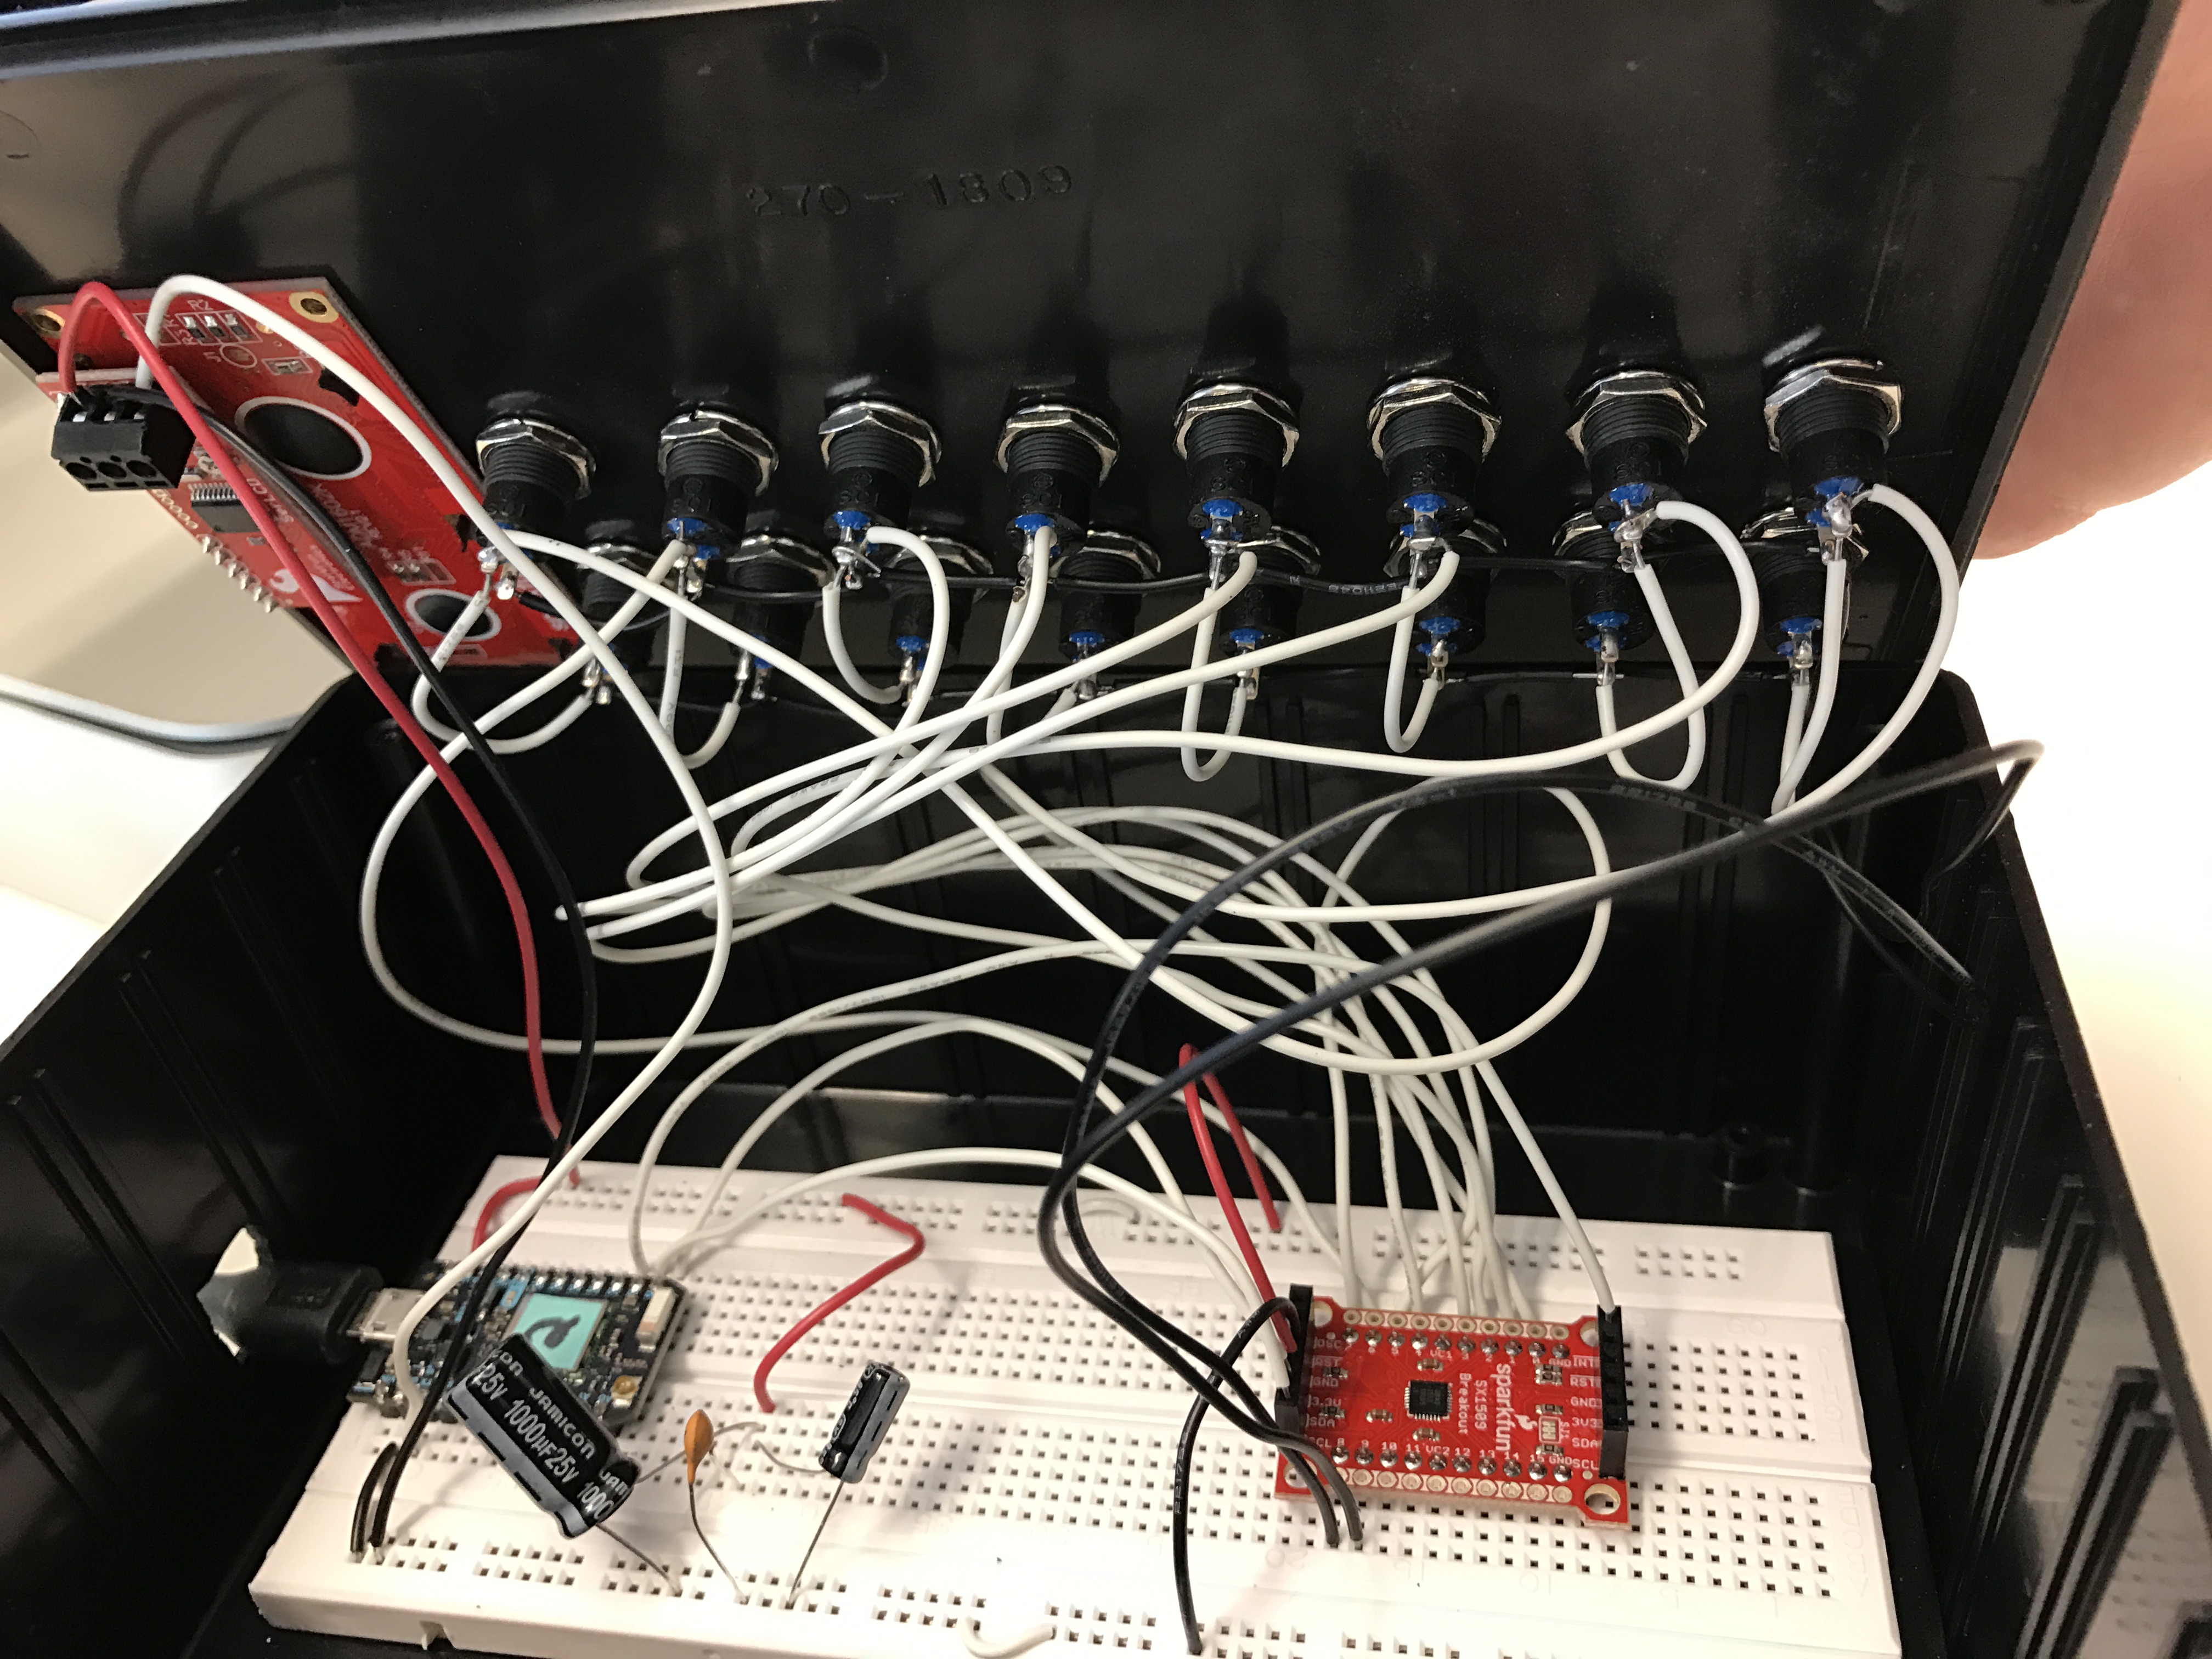
Here you can see the inside of the final assembly including the LCD screen.
And the final product from the outside.

The Code
When the user presses a button on Canimal, we need the Photon to detect that press and send the button number to the cloud. We can use the interrupt line of the I/O Expander to let us know when a button was pressed at which time the line is pulled low. In our code we’ll loop forever looking for this low signal. When we detect it, we’ll ask the keypad for which button was pressed. We can then send that number to the cloud via Particle’s cloud functions.
The code is implemented as a state machine. Here are the different execution paths through the states that the code can take.
No button was pressed:
- The Photon has first booted
- Check to see if the interrupt signal is low
- Interrupt signal is not low
- Turn off the LCD screen
- Wait a second for the LCD screen to turn off
- Sleep
Button was pressed:
- The Photon has awoken from an interrupt trigger
- Check to see if the interrupt signal is low
- Interrupt signal is low
- Turn on the LCD screen
- Wait a second for LCD screen to boot up
- Get the number of the button pressed from the I/O Expander
- Tell the user to crush the can
- Publish the button number to the Particle Cloud
- Wait a few seconds for the publish to go through
- Turn off the LCD screen
- Wait a second for the LCD screen to turn off
- Clear the interrupt
- Sleep
We first wrote the code to use the delay function to pause between steps but
the delay function pauses by using a timed while loop. This doesn’t allow
the processor to execute anything else while we’re delaying. This works well to
delay for LEDs but breaks when we want a delay to allow the system to post to
the Internet via Particle’s publish function. We refactored to use a state
machine that transitions states based on time passed using the millis
function.
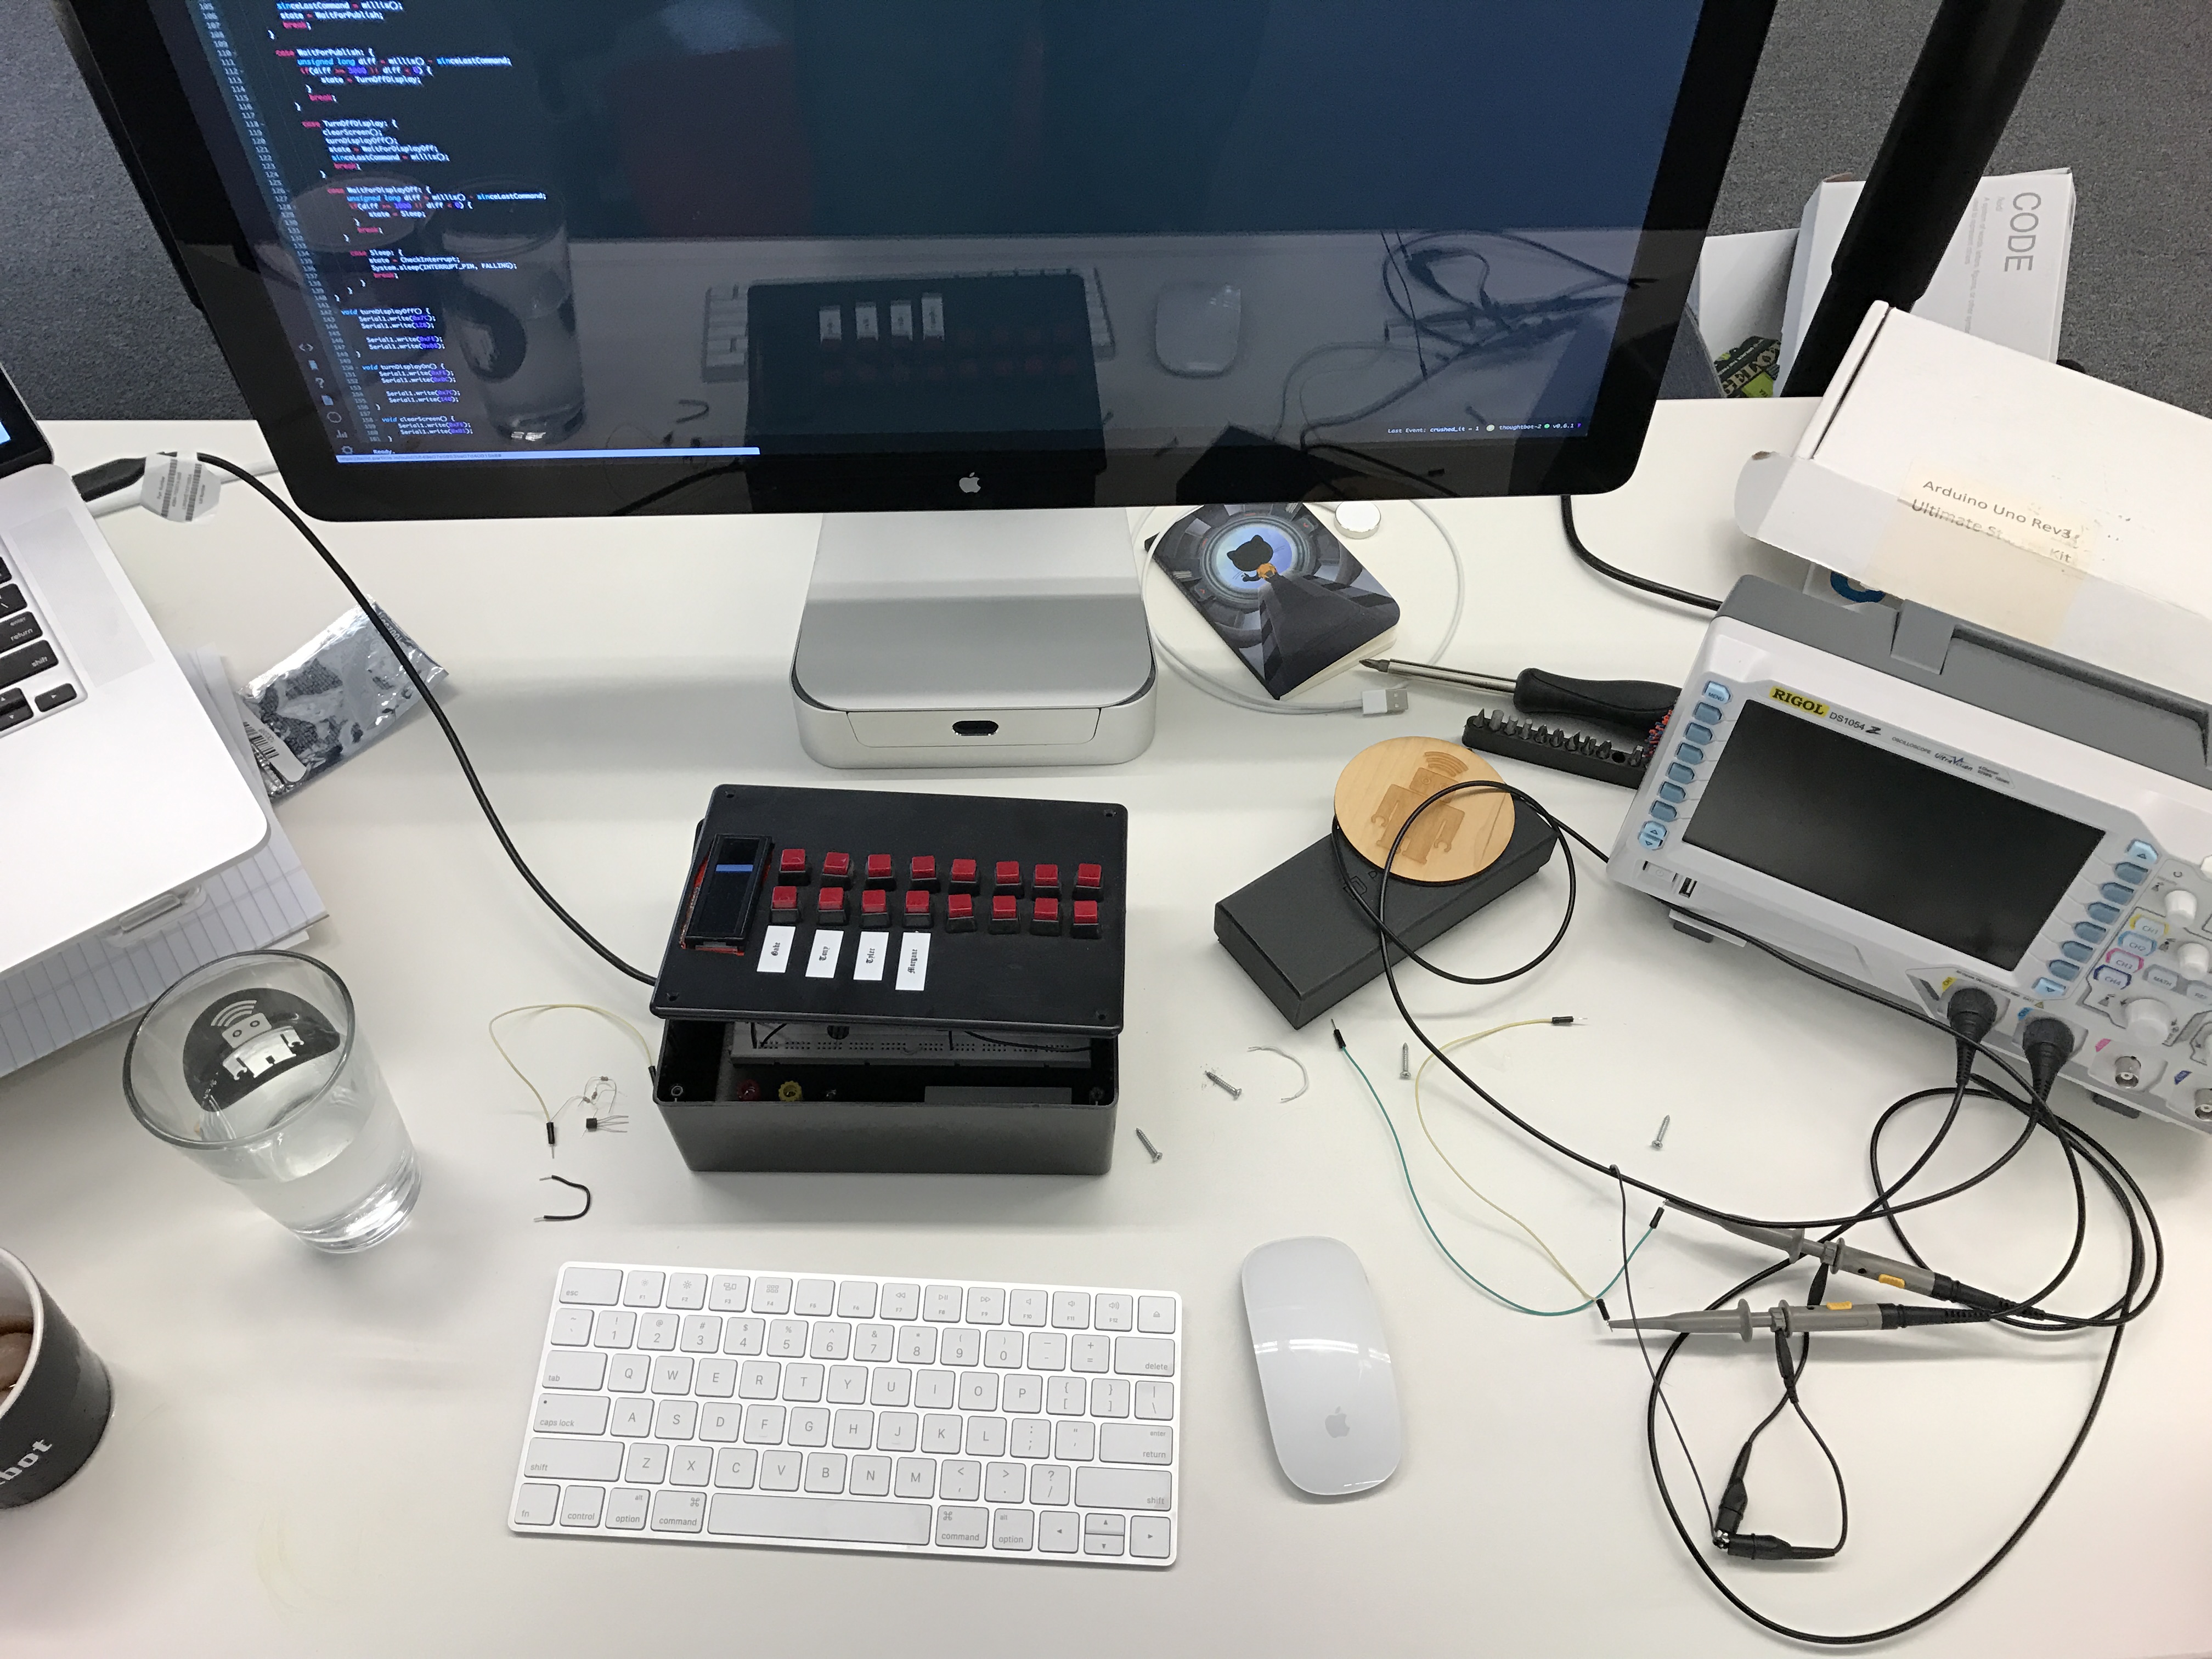
Here is a photo of us debugging the code using an oscilloscope (on the right). Oscilloscopes can be very handy when debugging embedded systems. One can use a spare output to toggle it high or low when certain parts of the code is executed allowing us to see the timing of everything.
The Website
The final piece to the puzzle was a website that we could visit that displayed out can crushing stats and showed us who was Top Croix. The site is a simple Rails app that has one POST endpoint. When data is published to the Particle Cloud, a web hook is fired and the data is posted to our Rails app. We can then visit the main website to see a graph of who’s winning.

As you can see, a simple problem can turn into a fun project to learn about hardware and embedded programming. As developers, we spend a lot of our time working with languages that abstract away a lot of the lower level hardware. Projects like these can really help us to understand how computers work at the basic level. Take a look around your office or home and I bet you too could come up with a fun internet connected hardware project.