Finally! A way to yell at your computer and have it actually listen.
Voice Control was first introduced in a beta for macOS Catalina. Like its name implies, it “allows you to edit text and interact with your computer by speaking to it.” If you’re using a Macbook or an iMac, good news! It already has the microphone you’ll need in order to try this out.
Much like my previous article on macOS Head Pointer, I figure I could show you how it works before I talk more about it:
In this video I am using Voice Control to scroll down the thoughtbot.com homepage, then navigating to our Services page. After that I search for “product design sprint,” then navigate from the first result to our blog post on the topic.
Why does this exist?
Not everyone uses a keyboard, mouse, or trackpad to use a computer.
Much like why Head Pointer exists, there are many permanent and situational motor control disabilities that may prevent you from using your arms or hands. They range in severity from things like a permanent spinal cord injury or Cerebral Palsy to Arthritis or circumstantially being prevented from using your hands.
A range of assistive technology options exist to help people experiencing these conditions. For voice command, the most popular options for deep, long-form use are Dragon and Talon.
Interestingly, voice commands have become far more popular and normalized for short-form use. Think about how ubiquitous voice assistants such as Siri, Alexa, and Google are. This isn’t the first, nor will it be the last example of how assistive technology gets normalized into the mainstream.
What can I do with it?
Pretty much anything you can do with a mouse, keyboard, or trackpad you can do with Voice Control. And much like Head Tracking, that’s the whole point. Inclusive Design teaches us that providing a comparable experience is vital, and Voice Control is a perfect example of such an experience.
How can I design and develop for it?
The most reliable way to ensure your web development work can be used by Voice Control? Use semantic HTML. The reason for this is Voice Control utilizes accessible names, a core part of how assistive technology is built.
How to create an accessible name
Consider this submit order button:

The phrase “Submit order” is a text string placed inside a button element:
<button>
  Submit order
</button>
Since we’re using a semantic button element, assistive
technology not only knows that it is a mechanism it can interact with, but also
that it is a button and not a link, input, or other interactive control. A
semantically neutral div element will not communicate this.
Assistive technology will then look for a string inside the button element and
use the information to generate an accessible
name. This is how you’re able to say “submit
order” and Voice Control will know what you mean.
Issues with unlabeled buttons
Providing an accessible name is also one of the reasons why it’s important to question if an icon alone is sufficient for communicating a button’s purpose:

Is this like? Vote? Approve? Something else? In some countries it means something a whole lot different!
Without a visible label, a button’s purpose can be difficult to determine, and consequently use. In addition to not having an accessible name, relying on iconography alone can also run into issues with the user’s:
- level of cognition,
- level of technological literacy,
- level of familiarity with the domain, and
- cultural background.
Having a visual label is the best solution. Unfortunately, sometimes there are situations where you can’t have your way. This is especially common in working situations where there isn’t a good rapport between development and design.
In these situations there are two techniques you can use to ensure an accessible name is still provided, even though there is not a visible label present:
The first technique is to use text wrapped in a span element that is hidden
visually via CSS. The second is to use the aria-label
attribute:
<button>
  <svg><!-- icon markup --></svg>
  <span class="visually-hidden">Submit order</span>
</button>

<button aria-label="Submit order">
  <svg><!-- icon markup --></svg>
</button>
Of the two techniques, visually hidden via CSS is preferable. Certain browsers
cannot translate labels generated with aria-label, to say nothing about
ARIA’s first rule of use.
This is one of the tricky things about accessibility: something that technically works in one scenario may not be ideal for others. The key is to try and support the widest ranges of circumstance from the beginning.
Clarifying what does what
Another good practice is to ensure accessible names don’t repeat. If you have 10 “learn more” links on a single page or view, it is tough to express which link you want to take action on. A great way to address this is to specifically name what the reader will learn more about in the link’s text.
<a href="tigris–euphrates.html">
-  Read more
+  Read more about the Tigris–Euphrates river system
</a>

<a href="mississippi.html">
-  Read more
+  Read more about the Mississippi River
</a>
Similarly, observing the “verb noun” pattern is great for naming actions. What are you saving? What are you deleting? This disambiguation both helps with cognitive considerations as well as providing a way to target a specific control if you’re not using a mouse or trackpad.
If this bucks your existing designs, know two things:
- Most of your users won’t notice or care if you update it,
- and if you get an extreme amount of pushback to make these changes you can still use the visually hidden CSS technique to make things accessible:
<a href="tigris–euphrates.html">
  Read more<span class="visually-hidden"> about the Tigris–Euphrates river system.</span>
</a>

<a href="mississippi.html">
  Read more<span class="visually-hidden"> about the Mississippi River.</span>
</a>
It’s more than just button
Anything that can be interacted with needs an accessible
name. The best way to go about this is, again, to use the
appropriate semantic element. a for links, button for buttons, label for
input, textarea, select, etc.
If you’re already using semantic HTML, good on ya. You probably don’t have to do any work to ensure your website or web app is accessible.
How do I enable it?
Let’s try it out! If you are using macOS Catalina (version 10.15) or later:
- Go to System Preferences.
- Go to Accessibility.
- Scroll down the sidebar to go to Voice Control, located in the Motor section.
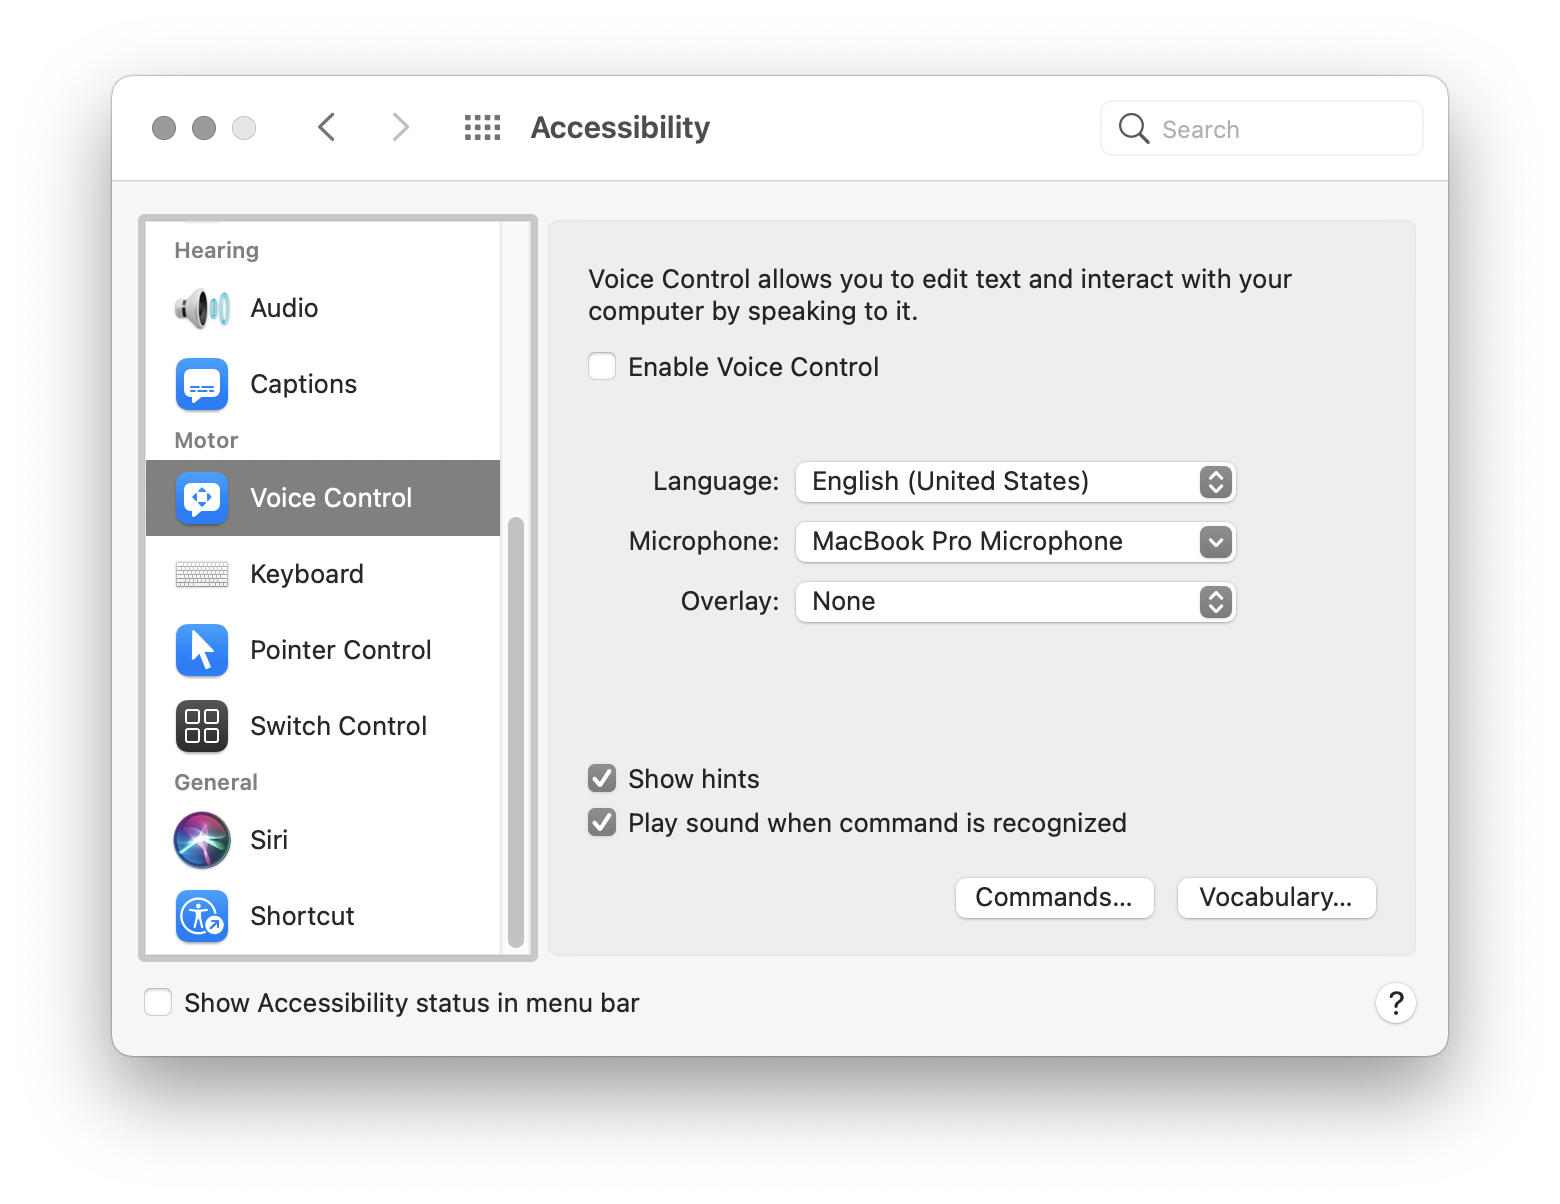
You’ll then want to check the Enable Voice Control checkbox. If this is your first time using it, you may see a notification prompt about needing to share your voice data with Apple so they can process it and turn it into a workable command. If you allow it, two new UI elements will show up, the microphone and a commands list:

The microphone is an indicator to show your Mac is listening to and processing commands. Saying “go to sleep” pauses listening to prevent accidental command activation, and can be unpaused by saying “wake up.” The commands list is a cheat sheet to help you learn some of the phrases you can use.
How do I use it?
Voice Control allows you to use basically every command made available to you on macOS. However, there’s two main things you’ll be doing during your day-to-day: navigating around and typing things.
Navigating
For the most part, you can get around by saying two commands:
- “Click x,” with x being the labeled UI you want to activate.
- “Scroll up”, “Scroll down”, “Scroll left”, and “scroll right,” as well as “Scroll to the top” and “Scroll to the bottom.”
In addition, there are two helpful commands to know: Show numbers and Show Grid.
Show numbers
Show numbers assigns a number to every interactive piece of UI on the screen. You can then say “click number,” with number being the UI you want to activate.

This screenshot has been cropped for clarity. Numbers 1-30 have been applied to other UI that is not present in this screenshot.
How does Voice Control determine what is interactive on the web, and therefore it can activate? You guessed it: semantic HTML.
Show grid
Can’t click on something by name or number because someone didn’t know to use semantic HTML? Don’t worry, Apple has you covered.
Saying “show grid” makes macOS put a numbered grid over your entire screen:

From there you can say one of two commands:
- “Click number,” with number being the whole area you want to activate.
- “Choose number,” with number being the grid cell you want to zoom in on.
The “choose number” command can be used multiple times, allowing you to zero in on a specific part of the screen. This can be helpful for scenarios where there is a tiny UI element that needs to be activated, or an element that has not been semantically described.
Here’s a video of that in action:
In this video I am using Voice Control’s choose number command to zoom in on, and select Safari’s encrypted connection notification lock icon on their URL bar.
Typing words
To type content into text fields, say the content you’d like to type out loud. If you would like to insert punctuation, say it as you dictate your content. For example, here’s a video of me dictating the sentence, “Hey, how is your day going?”
If you make a mistake, you can also use the phrase, “Delete the previous number characters/words/sentences.”
In this video I am using Voice Control’s deletion command to remove 22 characters from the end of a sentence, turning it from “Accessibility is cool, but difficult to do.” to “Accessibility is cool”.
Additional commands
You can do a lot more with Voice Control! You can review the full list of commands by either clicking on the Commands… button in the Voice Control pane in System Preferences, or review this article from iMore.
Customizing things
Much like Head Pointer, you can tweak Voice Control to better accommodate your needs. You can use two commands to do this: Vocabulary and Commands.
Vocabulary
If you press the Vocabulary… button on the Voice Control preference screen, you can open up a list where you can add your own words. Here, I’ve taught Voice Control the word “thoughtbot.”

This allows Voice Control to learn regional terms, jargon, and other words it does not have in its default dictionary.
Commands
If you need to extend the functionality of Voice Control, you can do so by pressing the Vocabulary… button on the Voice Control preference screen. Here, you can add, remove, activate, and deactivate Voice Control commands.
Here, I’ve created a custom command to open our guides repo in my default browser any time I say the phrase “thoughtbot guides.”

An observant reader may notice that I’m chaining the custom vocabulary word I just created into a custom action. This is a little trick to namespace commands to both help guard against accidental activation and scope the intent of what I want to do.
You’re not limited to just opening URLs, either. You can also:
- Open one or more Finder items,
- Paste text,
- Paste data,
- Press a keyboard shortcut,
- Select a menu, and
- Run a preset or custom workflow.
This range of flexibility gives you near-unlimited customization options.
My thoughts
I don’t identify as disabled, but I still enjoy and appreciate Voice Control.
I’ve started to take note of, and create automation for repetitive and obscure tasks, and then use custom Voice Control commands to perform them for me. In quarantine, I don’t have a loud office to contend with, so I can more confidently use voice commands without risking someone accidentally activating something on my laptop.
But I will stress that something I enjoy and benefit from was designed for disability-first use. We need to acknowledge that, as well as internalize it. Understand that assistive technology such as Head Pointer and Voice Control may be the primary way someone uses their computer.
As you create digital products, keep this in mind and do your part to create robust, accessible, and inclusive experiences. If that’s something you’d like help with, get in contact today!